Tuesday, August 26, 2008

Peaches and Cream Pie


Well the actual recipe I found was "Award WinningPeaches and Cream Pie" by Debbi Borsick, but seeing as how I changed the recipe a little, and I have won no prizes, I didn't think it fair to keep the Award Winning.

Anyways, I had a ton of peaches to deal with (and still have a few more), so what is the first thing you think of when your peaches are getting ripe on you - Peach Pie! I wanted to do something fun with this one, I knew I would get sick of them soon, and who doesn't like peaches and cream. The recipe had some great review and looked easy enough, so I hauled my Hubs to the grocery store and then got cooking.

Now, this is not a traditional pie crust, but I have to say that it is pretty tasty. It isn't what you think of though when you think of traditional peach pie.

Peaches and Cream "Pie"

"Crust"
1 box (non instant) vanilla pudding mix
3/4 cup all purpose flour
1 tsp baking powder
3 Tbsp butter
1 egg
1/2 cup milk
1/2 tsp salt

Filling:
~26 ounces of fresh peaches, pealed and sliced

Topping:
8 ounce block of cream cheese
1/2 cup white sugar
Any juice left from the peaches

Method:
1. Preheat the oven to 350F and grease the sides of a 10inch deep pie plate.
2. Mix together the pudding mix, flour, baking powder and salt. Mix in the egg, milk and butter. Beat at medium to high for 2 minutes before pouring into the pie plate.
3. Arrange the peaches over the batter.
4. Cream the cream cheese until fluffly, then add in the sugar and up to 3Tbsp of the peach juice. Spoon this mixture over the peaches.
5. Sprinkle the top with sugar and cinnamon ( I don't know the proportions I used or how much, as I have a premixed shaker in my cupboard I use to top stuff).
6. Bake in the oven for 30-35 mintues until the top is golden.
7. Allow to cool and chill in the fridge slightly before serving.

Review:
Hubs loves this, it is one of the few food that has been called "great" in a while (high praise from the man with no discriminating taste - he will eat pretty much anything). He has not gotten sick of it yet, even though last night he said "I never want to see another peach". When asked if that included this pie - he quickly said that the pie could stay!

Monday, August 25, 2008

It's Peachy


Well, Peach season is upon us, and thankfully I have inlaws living in the okanagan - which means amazing peaches picked and shipped to me. However, I failed to specify the number of peaches I wanted on the last shipment. Boy was I shocked when I went to pick them up (from out trucker friend) and found myself with 4 cases of peaches! Oh and that would be around 80lbs - of fresh peaches, either ripe or well on their way to being ripe.

2 cases were promplty sent to my mother for canning and dehydrating, leaving me with 2 boxes to try and figure out what to do with. So far the list is:

1. A peach and cream pie
2. Freezer pie fillings
3. Fresh peach pie
4. Eating a whole lot of peaches.


If anyone out there has any ideas that do not involve canning or jam ( I do not the equipment or kitchen space) please let me know!

Thursday, July 31, 2008

"Mississippi Mud" bars


So I am a major chocoholic and every once in a while I have to give in and bake myself some brownies or something equally full of chocolate. Yesterday as I was killing time at work I came across a recipe for "Mississippi mud bars" on allrecipe.com that had some good reviews, so I thought i would give it a try. After making a couple of changes based on some of the reviews, this is what I came up with:

Ingredients:
1 cup margarine or butter
1/3 cup coco powder
4 eggs
1 1/2 cup granulated sugar
1 1/2 cup flour
1/4 tsp salt
2 tsp vanilla
1 pkg mini marshmallows

Directions:
1. Preheat the oven to 350F.
2. In a saucepan over medium low heat, melt the butter or margarine. Then remove from heat.
3. Mix in the coco powder until smooth. Add the eggs, sugar, salt and vanilla. Once the sugar is mixed in add the flour.
4. Fold in the mini marshmallows.
5. Pour into a 9X13 pan (I line mine with parchment paper rather than greasing and it works extremely well).
6. Bake for 25 to 30 minutes, until the brownies pull away from the pan.

The original recipe also had a recipe for a frosting to go on top, but I didn't bother with it. I tend to like my brownies best without a frosting, and these did not disappoint.

Reviews:
Hubby: He loved these brownies and ate almost half a pan when he discovered them!

The Baker: While these aren't what I normally think of when I think Mississippi mud bars (I usually think marshmallows on top), I thought that these were delicious and they satisfied my chocolate craving.

Other: The girls at work also loved these, and the guys were so disappointed that they missed out on getting some that I had to promise to bring more in.

Friday, July 25, 2008

Super Quick and Easy Key Lime Pie


I have been told that I am odd due to a strong aversion to cooked fruit resulting in me not eating pie. However, I do love cream pies and pies that do not include chunks of cooked fruit and at the top of my list is Key Lime. However, I really just do not have the patience for juicing limes in order to actually make to pie. I was excited upon opening an issue of Real Simple to find a quick (and cheater) recipe for making key lime pie. I couldn’t wait to try it, and due to the sweltering heat that has been moving in over the past few days, it would be the perfect dessert.

Ingredients:
1 frozen limade concentrate
1 cup heavy/ whipping cream
1 can sweetened condensed milk
1 prepared graham cracker crust.

How to:
1.Mix together the frozen limade concentrate, cream and condensed milk in a bowl and cream with an electric mixer (with a whisk attachment) until it is light an d fluffy, forming soft peaks.
2. Pour the filling into the crust and smooth the top.
3. Refrigerate until chilled and loosely set (4hour to overnight)

For garnish, sprinkle to top with lime zest before surving.

Reviews:
This was a great light and refreshing desert. It has gotten rave reviews from all my coworkers (who managed to polish off 30 tarts in a lunch) and friends who told me they were keeping the leftovers after a BBQ.

Monday, July 21, 2008

Chocolate Peanut Butter Bars

I was in the mood for something sweet and chocolately, but as the outside temperature was around 33C (and the inside of my little apartment wasn’t much better) turning on the oven to actually bake something was not going to happen. I needed something that would require no heat to make and minimal effort on my part, as I feeling like I was starting melt just sitting on the couch! I managed to come across a recipe for peanut butter bars on allrecipe.com – and a comment saying they tasted just like a Reese peanut butter cup sinched the deal – I needed to make these.

Ingredients:
Base:
½ cup margerine, melted
1 cup graham cracker crumbs
1 cup confectioner’s sugar
½ cup peanut butter

Topping:
¾ cup semisweet chocolate chips
2 tbsp peanut butter

Directions:
1. In a bowl mix together the margerine, peanut butter, graham cracker crumbs and confectioners sugar until well blended. Pour into and 8x8 pan and press evening into the bottom of the pan.
2. In a double boiler (or a bowl over hot water / a microwave safe bowl) melt the chocolate chips and peanut butter for the topping together. Melt, stiring occationly until smooth.
3. Spread the chocolate over the peanut butter base in the pan and smooth. Refrigerate for at least one hour or until set, before cutting into squares.

Review:
I loved this, but them I am usually a fan of anything involving chocolate and peanut butter. Hubby thought this was great and didn’t want to share. His lucky friends that managed to sneak one from him loved them.
Actually, he ate them all so fast, I wasn't even able to get a picture of them - although that is my fault for not taking the picture before he was able to get his hands on them! Sorry, I will update with a picture as soon as I make these again (tonight maybe?).

Tuesday, July 8, 2008

Perogie Casserole!

I needed a quick supper one night that I could just through together quickly. I found a bag of perogies in the freezer and remembered a casserole that my friend and old roommate used to make that was great. I knew I had everthing I needed (including a greenpepper in desperate need of being used), but I couldn’t find the recipe – even allrecipe.com yielded no help. Then I stumbled across the recipe on another blog – r2bcluvs2cook. Thank you r2bc for posting this recipe.

Ingredients:
20 perogies (frozen)
1 onion chopped
¼ cup milk
1 tbsp butter
½ cup cooked ham
1 green pepper
1 can cream of mushroom soup
¼ cup shredded chedder cheese

How To:
1. In a skillet sauté the onion and green pepper with the butter for 5 mintues.
2. Combine in a medium sized casserole dish the onion, green pepper, ham and frozen perogies.
3. Mix the milk and cream of mushroom soup together and pour over casserole.
4. Top with the shredded chedder cheese.
5. Bake at 375C for 35 minutes.

Reviews:
I have always loved this casserole and was excited to make it again. I found it to be a little runny as far as casseroles go, but this could be easily fixed by adding a little less milk, or a few more perogies.

Hubby thought this was a great casserole and happily took all the leftovers (oh, and I for once had leftovers, the bottomless pit that is my husband wasn’t able to eat the whole thing in one night, although that may be due to going to a friends place for the evening.)

I am sorry there is no picture, but alas, my camera batteries have died.

Monday, June 9, 2008

Low Fat Cheesecake

After some channel flipping one day I came across a show on the foodnetwork called "Eat Shrink and be Merry", well who wouldn't be intrigued by that title? I decided to watch and found they had some really good ideas for how to lower the fat and calorie content of some of my favourite foods. So while trying to find some of their recipes I discovered they also have a cookbook out, and on their website they have a few sample recipes. I decided to try a recipe before buying the cookbook, and this is the result:


Low Fat Chocolate Cheesecake:
I followed the Eat Shrink and be Merry recipe pretty much exactly.

I used the Betty Crocker Low Fat Brownie mix, and it worked great.

Reviews:
Everyone loved the cheesecake. Hubby happily ate seconds when I told him that I needed to get a picture of piece

Tuesday, April 15, 2008

Creamy Dill Salmon (and Chicken)


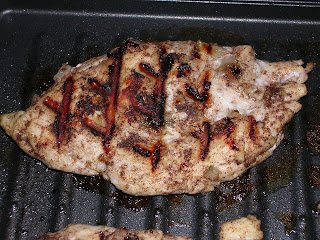
So, every few weeks, I treat my husband with some fresh fish from the local fish market. Well this week's special was steelhead salmon, so I came home with a pound of salmon and no idea what I was going to do with it. My original thought was to try and find a cedar plank somewhere and BBQ it, but after poking around a little bit, I couldn't resist trying this recipe for creamy dill sauce. Seeing as how I don't eat fish, I used the sauce on a chicken breast and threw it in with the fish to cook.

INGREDIENTS:
3/4 cup mayonnaise ( for a lower fat version, switch this to low fat yogurt)
1/4 cup prepared mustard
1/2 tsp thyme
1/2 tsp oregano
1/2 tsp basil
1 salmon fillet
Dill

Method:
1. In a bowl mix together mayo (yogart), mustard, thyme, oregano and basil. Pre heat the oven to 375F.
2. Smooth the sauce over the fish (and the chicken breast). Sprinkle with dill to taste. Bake for 20 to 30 mintues, or until the fish is cooked and flakes easily.
3. Save the extra sauce, it is great to add a little more when the fish is finished cooking.

REVIEWS:
Hubby loved this recipe and it was really easy to make. He actually ate half a pound of fish in one sitting. I loved the sauce on the chicken. I did try the salmon as well and as much as I dislike fish, I actually kind of liked it. Next time I cook this however, I will definately not let Hubby have his way, and I will be using the yogurt.

Peppermint Patties


I love chocolate covered peppermint in almost any form so I decided to try and make some of my own peppermint patties. I found a few recipes on allrecipe.com, and after much searching, reading of reviews and tweaking, this is what I came up with.

INGREDIENTS
4 ounces low fat cream cheese
1 tbsp butter
3 cups icing sugar
2 tsp peppermint extract

METHOD:
1. Cream together the cream cheese, butter and icing sugar. Add the peppermint extract (Note you can test it at this stage for consistany you want as it may need a little more confectioner's sugar, or peppermint extract. If using peppermint oil, add a drop at a time and test for taste.).
2. Roll into medium sized balls and place on waxed paper. Flatten with a fork and let dry for a few hours.
3. Melt chocolate in a double boiler and dip dry patties in melted chocolate. Let harden on wax paper
4. Enjoy!


REVIEWS:
We all loved these, and the batch was gone by the end of the next day. They were delicious and completely addictive. These will be made many more times.

Saturday, March 29, 2008

Italian Potatoes


I love potatoes with a meal but after eating them at least 3 times a week for 18 years, you get a little tired of the same old mashed and baked potatoes. Well, one night upon realizing that Hubby had a hockey game that we had to leave for in just over an hour and I hadn't even decided what to make for supper yet - I was in need of something quick and simple.

INGREDIENTS:
4-5 medium Unpeeled potatoes, chopped into cubes
1 to 2 tbps olive oil (the recipe called for 2 but I found I didn't need that much)
1 pkg zesty italian seasoning ( I used 2 -3 tablespoons of Club House One Step Seasonings - Italiano)


HOW TO:
1. Place chopped potatoes into a sealable bag (like a large ziploc) and drizzle with oil. Shake until they are coated.
2. Sprinkle seasoning over the potatoes, seal bag and shake until coated. You can adjust the amount of seasoning you would like to add, just make sure they are all a little coated with seasoning.
3. Dump the potatoes into a shallow pan so that they form a single layer and bake for 30 minutes at 400F. Then remove from the oven, stir and cook for another 5 to 10 minutes until they are browned.

REVIEWS:
These were delicious and so easy to make! Hubby loved them and couldn't stop eating them - so much for leftovers.

Thursday, March 20, 2008

Just like a Scorebar!


After recieving a candy thermometer in the Jknotties Kitchen Gadget Exchange I decided to try making some more candy. I love toffee so I went looking for a recipe. Most of the toffee recipes I found included nuts - and I am really not a fan of nuts in my baking or candy so I decided to just leave it out.

I got this recipe off of allrecipe.com and it is delicious - with semisweet chocolate chips on top it tastes almost exactly like a skor chocoate bar! Thanks to FUNKYSEAMONKEY for this great recipes!

I cut the recipe down a lot as I didn't want to have a ton of this candy laying around.

INGREDIENTS
1/2 cup butter
1/2 cup white sugar
1/8 teaspoon salt
1/2 cup semisweet chocolate chips


DIRECTIONS
1. In a large heavy bottomed saucepan, combine the butter, sugar and salt. Cook over medium heat, stirring until the butter is melted. Allow to come to a boil, and cook until the mixture becomes a dark amber color, and the temperature has reached between 280 - 290 F (137 degrees C). Stir occasionally.
2. While the toffee is cooking, cover a 8x8 baking pan with aluminum foil or parchment paper.
3. As soon as the toffee reaches the proper temperature, pour it out onto the prepared baking sheet. Sprinkle the chocolate over the top, and let it set for a minute or two to soften. Spread the chocolate into a thin even layer once it is melted.
4. Place the toffee in the refrigerator to chill until set. Break into pieces, and store in an airtight container.


REVIEWS:
As I have said above this tasted just like a skor bar. The entire batch was gone the night I made it. Hubby and his friend could not stop eating it! The hockey guys also loved the little bits I was able to save for them that night. This was delicious and will become a family favourite I am sure.

Cinnamon Buns Take Two


So after my first attempt at cinnamon buns I decided that I wanted something a little softer and gooey. The other cinnamon buns were alright, but they weren't soft like a cinzeo bun. Upon looking an all recipe.com I found a very well rated cinnamon bun recipe that looked easy enough - A clone of a cinnabon.

I halved the recipe but made the same amount of icing. I also followed some of the reviews and did this without a bread maker as I do not actually have one. What I did is outlined below:

INGREDIENTS
Dough:
1/2 cup warm milk (110 degrees F/45 degrees C)
1 eggs, room temperature
2 tablespoons and 2 teaspoons margarine, melted
2-1/4 cups bread flour
1/2 teaspoon salt
1/4 cup white sugar
1-1/4 teaspoons bread machine yeast

Filling:
1/2 cup brown sugar, packed
1 tablespoon and 3/4 teaspoon ground cinnamon
2 tablespoons and 2 teaspoons butter, softened

Icing:
1 (3 ounce) package cream cheese, softened
1/4 cup butter, softened
1 1/2 cups confectioners' sugar
1/2 teaspoon vanilla extract
1/8 teaspoon salt

METHOD:
1. In an oven safe bowl mix together the ingredients for the dough and knead together.
2. Heat the oven to 200F and then turn it off. Cover the dough with a damp cloth and pace in the oven to rise for about an hour or until the dough has doubled in size.
3. In a separate bowl mix together the ingredients for the filling as the dough is rising.
4. Remove from oven and roll into a rectangle. Cover with the filling and roll.
5. Cut into 6 buns using a serated knife, and place in a 8x8 pan.
6. Cover with a damp cloth and place in the oven for another 30 mintues or until the buns have doubled in size.
7. Heat the oven to 400F and bake for 15 to 20 minutes or until the buns are golden brown.
8. While the buns are baking cream together the ingredients for the icing.
9. Place icing on warm buns and serve.


REVIEWS:
These were absolutely delicious and everything I hoped they would be. Hubby loved these as well and his friend said they were great as well. I will make these again for sure!

Saturday, March 15, 2008

Homemade Nutella!


I am a nutella fanatic, I can't have a jar in the house or I will eat it by the spoonful if I have nothing to put it on. Now, even though I love the stuff, I can often find it a little sweet (well a lot sweet at times - like by the third serving in 10 minutes). I always thought it would be great to find a less sweet version - and upon my internet wandering on day I ran across a blog that caught my nutella loving attention - Su Goods Sweets. On her blog there were not only one, but Two recipes for making your own Nutella!

My Mother in law has a great yard complete with a hazelnut tree, so instead of going and buying some nuts, I had her send me some nuts from the fall off the tree. She sent me a rather large amount of nuts, and I proceeded to spend the next couple days cracking nuts until I had 2 cups of whole hazelnuts with the skins still on.

I decided to use the second recipe as it had apparently been revamped from the first one to cut down on the chalky taste of the powdered sugar.

My first attempt at making the caramel sugar didn't turn out so well, as I wasn't sure how dark a "medium amber" was supposed to be. The second time I made the caramel sugar I broke out the new candy thermometer and took the sugar to "hard crack" at about 300F. This worked perfectly.

The nutella turned out great, less sweet than the brand name stuff and more nutty. Everyone who has tried it loves it!

Thanks to Jessica for the fantastic recipe!

Orange Brownies


So I was grocery shopping last weekend, and upon getting the checkout I was informed that I got a free box of oranges. Now thinking that this was free and as such would only be 5 or 10 oranges, I gladly accepted my free oranges. Then I I get the oranges and find that it is a rather large box with at least 25 oranges in it. Now I love oranges, but there is no way I can eat that many. Upon looking in a couple of my cookbooks for some baking that I could do with them I found a recipe for orange brownies, now this recipe uses a boxed mix, but I thought I wuld give it a try as I had a box mix in the cupboard and I couldn't think of anything else I would use the mix for.

Orange Brownies:
INGREDIENTS:
1 box of fudge brownie mix
1 whole orange

DIRECTIONS:
1. Cut the orange into quarters and remove the seeds. Place quarters (including the rind) into a blender/food processor and blend until smooth.
2. Mix the box of mix together as directed on the box, leaving out the water. Instead of adding water, add the processed orange.
3. Follow the box instructions for baking.


These brownies were delicious - they tasted like a Terry's Chocolate Orange. I will definately make this again ( or maybe I will try to make a non box version of the brownies.)

Thursday, March 13, 2008

Gadget Exchange

As some of you may have seen on other blogs (or may have been part of) a group of us did a Kitchen Gadget Exchange in February. Well, due to customs, mine was a little delayed - but it is here now! I want to thank the lovely Dawn for the fabulous gadgets. I can't wait to start using them.


Included in the package was a candy thermometer with a digital readout. This is great, as now I don't have to worry about going out to buy one to continue my candy making adventures and the bonus - I don't have to wear my glasses to read it. Also included were some small cake pans that will be perfect for making cakes for 2, so maybe I won't have so much baking around the house and have to find people to pawn it all off one. I am looking forward to making some more cakes.

Thanks again Dawn, the gadgets are great. Look for updates on their handiness in the near future!

Monday, March 10, 2008

Chocolate Covered Caramels


So, even though I had halved the caramel recipe I made on the weekend, I found myself with an whole lot of caramels. I decided to have some fun with them, and since they were really sticky when you tried to touch them, I decided to try covering them in chocolate.

Method:
Melt 1/2 cup semisweet chocolate chips

Dip caramels into the melted chocolate and set on parchment paper to cool.

Once cool and hardened wrap the chocolate caramels in pieces of parchment paper and enjoy.


REVIEWS:
My Hubby and his friends loved these, and were eating them all night. However once they found the uncovered caramels they decided they were better without chocolate on them (but only slightly). His friends all left with pockets full of Caramels.

Butterless Banana Muffins


I am in love with banana muffins and banana bread, but not in love with fat filled desserts (I need to wear a swimsuit in a month!). Now I was unable to find a low fat banana muffin recipe that was still as good as the regular recipe, so I set out on a mission to make my own. The result was the following recipe, that is delicious, even my Hubby loves these muffins.

INGREDIENTS:
3 large mashed ripe bananas (~1.5 cups)
3/4 cup white sugar
1 egg
1/3 cup unsweetened applesauce
1 tsp baking soda
1 tsp baking powder
1/2 tsp salt
1 1/2 cup all purpose flour.

DIRECTIONS:
1. Mash the bananas, then add applesauce sugar and egg. Mix well with the masher.
2. In a separate bowl mix the dry ingredients before adding them to the banana mixture.
3. Fill muffin tins/muffin cups with batter. Bake at 375F for 20 minutes.


REVIEWS:
Note: I added chocolate chips to half the batter for my Husband, he loves chocolate chips in his banana bread and muffins. These are super good as well, and my Hubby can't tell the difference between them and the regular oil/butter recipes.
I LOVED these muffins, and think they are one of the best banana muffins I have ever made.

Sunday, March 9, 2008

Cinnamon Buns in a Hurry


I was craving cinnamon buns today and decided to make some, only to find that I was out of yeast. Then I discovered this recipe in my old 4H cookbook. I was so happy to be able to make the buns without waiting for the dough to rise, so I decided to try it.

INGREDIENTS:
Dough:
3 cups flour
2 tbsp sugar
4 tsp baking powder
1 tsp salt
1/4 cup unsalted cold butter
1 cup cold milk

Filling:
1/3 cup butter
1 cup packed brown sugar
3 tsp cinnamon
1/4 cup raisins

DIRECTIONS:
1. Combine the flour, sugar and baking powder in a large bowl. Cut in the butter and mix well. Add the milk, and mix. Knead until a dough is formed.
2. In a small bowl cream together the butter, brown sugar and cinnamon for the filling.
3. Put 1 tsp of the filling into the bottom of each sup of a muffin tin.
4. Roll the dough out into a rectangle. Spread the filling out onto the rectangle and sprinkle with the raisins. Roll the dough into a roll and cut into 12 buns. Place a bun in each of the muffin tins.
5. Bake at 400F for 20 minutes.

These buns were yummy with lots of cinnamony goodness. However, the dough could have used some more liquid and 20 minutes may have been a tad long for baking. After they cooled the dough became dry and not as yummy. They were good wile they were warm, but not so much afterwards. I don't know if I will make these again.

Saturday, March 8, 2008

My Attempt at Making Caramels


This weekend I had the pleasure of being home alone for the whole the weekend - now as great as it is to have some peace and quiet I also found that having this much time on my hands leaves me extremely bored. Especially when things that were planned fall through - through a calander error plans I had for the weekend seem to actually be taking place two months later - I had written them down for March instead of May.

So with all this extra time I decided that I would try something that I have been meaning to try for years - making my own caramels. I had always shied away from this due to my lack of a candy thermometer (I have been meaning to get one for ages, and somehow it always gets forgotten) and my fear of the candy "stages". I had the time and nothing to do so I figured I would just run out and get a candy thermometer - turns out my Hubby took the car keys with him, so no luck on going anywhere. Now instead of doing the smart thing and waiting till I had a thermometer, I decided to try my luck with the "stages".

I found an easy looking Chewy Caramel recipe on Allrecipe.com and decided to give it a try. So in trying to get everything ready in order do the softball testing, I accidently let the sugar burn a little. I am hoping people don't notice it too much (I didn't when I tested the mix). Then off course I was completely paranoid that I was going to overcook the mixture and I am pretty sure that I have undercooked it, as it is really soft and I had to put it in the freezer to get it hard enough to cut. This isn't actually so bad, as I love softer caramels that you suck on more than you chew.

I am took them to my H's team's hockey game tonight and some of his team-mates and spectators tried them. They all liked them, although they did say chewing them wasn't a good idea. I will try this again when get a thermometer and see if I can't get them a little harder.

Chicken Kabob


So after a long winter and it not being quite ready to warm up yet, I decided I needed to add a little spring and summer to my dinner. What is more summery than Hawaiian chicken on kabobs?

INGREDIENTS
3 tablespoons soy sauce
3 tablespoons brown sugar
2 tablespoons sherry
1 tablespoon safflower oil
1/4 teaspoon ground ginger
1/4 teaspoon garlic powder
3 lg skinless, boneless chicken breast halves - cut into cubes
1 (20 ounce) can pineapple chunks, drained
1 green pepper
1 red pepper
skewers

DIRECTIONS:
1. Mix the soy sauce, brown sugar, sherry, oil, ginger and garlic powder in a dish to be used for marinading.
2. Add the chicken and veggies to the marinade (Note it is safer to use two marinades and keep the chicken and the veggies seperate), marinade for at least 2 hours.
3. While the chicken and veggies are marinading, soak the skewers in water so they will not burn.
4. Spear chicken and vegetable onto skewers and grill until the chicken is cooked.


Reviews:

I loved this! It was just the burst of summer I needed as a pick me up. Hubby said this was keeper recipe and his friend raved about it. The only thing I would do differently is marinade it a little longer - I barely made the 2 hour mark.

Tuesday, February 26, 2008

Chicken Lasagna


Alright, so we were having friends over for supper and I wanted to make something new. I got the idea of making chicken lasagna into my head and it was decided that is what I would make. However, I also knew that I had a bunch of veggies in the fridge I needed to use. After searching for a recipe that is what I was looking for, I was unable to find something that truly appealed to me. So, being stubborn, I decided to make my own recipe rather than switch what I was going to make.

It turned out delicious, although soupy (I would cut out the milk next time I made it to help with that). My friend loved it as well!

Vikki's Veggie filled Chicken Lasagna

3 chicken breasts
1 green pepper
1 small onion
2 cups fresh spinach
1 cup broccoli florets
1 can cream of chicken soup
1 tbsp corn starch
1 cup nonfat cottage cheese
1 cup chedder cheese shredded
1/4 cup mozza cheese shredded
lasagna noodles

1. Cook chicken breasts, then shred and set aside.
2. Chop the green pepper, broccoli, spinach and onion (finely) and saute in a pan with a little oil. Add the cream of chicken soup (mixed with milk) and heat. Add the corn starch and set aside.
3. If using regular lasagna noodles, cook in boiling water for 8 - 10 minutes.
4. Layer the ingredients in the following way: noodles, chicken, sauce, cottage cheese, chedder, noodles, chicken, sauce, cottage cheese, mozza, noodles, thin layer of sause, chedder, mozza, parmasean cheese.
5. Bake for 40 minutes at 350F.


I served this with yummy sundried tomato foccia bear bred that I picked up a craft sale earlier in the year. It was delicious and we all loved it. I will have to order some more of these! It was super easy to make - just add beer and bake, my kinda bread baking.

Sunday, February 24, 2008

Butter Free Brownies


I have been searching all over to find some brownie recipes to try that will reduce the amount of fats - Less butter, marg and oil, and finding it rather difficult to find any good recipes. So in playing around on the web this weekend I stumbled across a brownie blog - Brownie or Die! And what do I find on it but a yummy looking butterless brownie recipe, with coffee. Now I am not a huge coffee fan, but I love a hint of coffee in my chocolate occasionally. I did reduce the amount of coffee grounds in the batter to 1/2 tbsp, as I didn't want an overpowering coffee flavour.

Update: These were really good, especially for a lower fat version! Cutting the coffee was great for me, as it was just a hint of coffee flavour, however if you are a fan of coffee go for the full amount. Oh, and I did make one alteration to the recipe, instead of bittersweet chocolate I used 5 ounces of semisweet chocolate and 1 ounce of unsweetened chocolate.

Owen even liked them, but said that he could feel the caffeine after a couple brownies (neither of us usually have much caffiene in our diets).

I will be making these again - thanks to Brownie or Die!

Applemania

Last week I made a trip to the farmers market for some veggies and fruit. My husband being a native of the Okanagon region of BC, loves his fruit, and I was so excited to get him some BC grown apples! Apparently I went a little overboard on the apples and before Owen could eat them, they were getting a little overripe. (Although I have a little feeling that there was a little bit of forethought on this on his part - as he quickly put in a request for apple crisp!) So I humored him and made my apple crisp, then having leftover peeled apples, I went on the search for something new and found a yummy cookie recipe!

Vikki's Crisp

I originally made up this recipe in a search for the perfect rhubarb crisp, and it turned out so well I adapted it to other fruits over the years. This is the apple version (of course).

Topping
1/2 cup warm (NOT melted) margerine or butter
2/3 cup flour
1 1/3 cup brown sugar
1 1/2 cup oatmeal

Fruit Filling
4 cups peeled and chopped apples
2 tbsp water
2 tbsp lemon juice
(if using tart apples, you can add a little white sugar to the fruit)
1-2 tsp cinnamon to taste

Directions:
1. Mix the topping ingredients together in a medium bowl. Mix until it forms crumbly mixture and set aside.
2. In an 8x8 pan mix togethet the filling ingredients
3. Top with the topping mixture ( you may not want to use all the topping, I usually have about 1/4 cup or so left over - it makes a yummy snack!)
4. Bake for 35 minutes at 375.

Apple Oatmeal Cookies

I found this recipe from a cookbook I got as a shower present - 500 best Cookies, Bars & Squares by Esther Brody. It called for 1 cup of nuts as well, but as I am not a huge fan of nuts in my baking and as such didn't have much on hand, I decided to leave them out.

Ingredients
1 3/4 cup flour
1/2 tsp baking powder
1/2 tsp baking soda
1/2 tsp salt
1/2 cup oats
1/2 tsp cinnamon
1/2 tsp nutmeg
1/2 cup shortening
1 cup packed brown sugar
2 eggs
1 cup finely chopped and peeled apples
1 cup raisins

Method:
1. In a medium bowl mix together the flour, baking powder, baking soda, salt, oats, cinnamon and nutmeg.
2. In a second large bowl cream together the shortening and brown sugar. Add the eggs one egg at a time and mix throughly.
3. Mix the apple and raisins into the shortening and sugar mixture. Add in the flour mixture and stir. (if adding nuts, they should be folded in after the flour)
4. Drop teaspoon sized cookies onto a prepared cookie sheet and bake for 10-12minutes. The cookies should be a golden brown colour but still soft.
5. Remove to a wire rack to cool.

Ratings/Comments:
Owen seems to really like these cookies - he even refused to share them his hockey team! I did manage to sneak some to the hockey wives, and came home with non left.


I used my mini-food processor to chop the apples and it took about 30 seconds which was great! I can also eat come of the cookies as their aren't large chunks of fruit! I highly recommend this!

My Brown Sugar Dilema

So, upon becoming incredibly frustrated trying to organize my Husband's bike equipment in the den, I decided to do some baking and calm myself before one of the bikes ended up in pieces on the lawn (having been tossed through a window). Now to add to the frustration I come into the kitchen to find that someone has been into my brown sugar, which is now just a rock of sugar. So, here I am, with a batter started and short of taking a sledge hammer to this sugar, I have no idea how i am actually going to get it to a form I am able measure and mix with other ingredients. Being my stubborn self I refused to go the store and buy any new sugar (and the fact that I am nursing a sore knee, and walking that far is out of the question). To add to the problem, my brown sugar mouse has mysteriously gone missing! So I can't even put that in the sugar for a few hours to try and soften it up.

After a few minutes of trying to break the rock of sugar into a fine sand for use, I decided that just wasn't working. Rather than admit defeat I got creative - really I didn't have much to lose at this point. Turns out in a moment of genious I figured out a quick fix to my problem!

I opened my sugar as much as possible and popped it into the microwave with an open bowl of water. I zapped it long enough to make the water steam and left it for a few minutes. Much to my delight my sugar was now soft, sweet and useable!

Tuesday, February 19, 2008

The missing Cookie Cutter

So, I decided to make some heart shaped sugar cookies for Valentines day. I had everything ready to go and I couldn't find my heart shaped cookie cutter. So thinking that because it is Valentines day and everyone should have lots of heart shaped cookie cutters, off I go in search of one. Turns out not a single store within walking distance from my house has heart shaped cookie cutters and so, I returned home without a cookie cutter and not sure what I was going to do.

Then in a moment of brilliance I decided to make my own cookie cutter - How hard could it be right? Well about an hour or so later and after experimenting with different types of matterials, I managed to come up with a pretty decent heart shaped cookie cutter. I was really impressed that I had managed to bend a coat hanger into such a decent looking heart! Well when Hubby got home, he was not all that impressed and just headed straight for the cookies. However, everyone else has loved my cookie cutter so I thought I would share!

So here it is:

Valentines Cookies


So, as my husband was working evenings all last week, I had some time to kill and decided to make some valentines day cookies. I was craving chocolate chip cookies so I decided to try and make them look a little more festive. So, I made small cookies and then pressed chocolate hearts into them when they came out of the oven. These cookies were delicious and totally satisfied my chocolate chip cookie cravings.

I love this recipe and haven't found one much better yet, even though it comes from the back of my Chipits.

Ingredients
1 cup shortening or softened margerine/butter
1 cup packed brown sugar
1/2 cup white sugar
2 eggs
1.5 tsp vanilla
2 cups flour
1 tsp baking soda
1/2 tsp salt
Chocolate chips
Chocolate hearts

Method:
1. Cream together the shortening and the sugar. Beat in the eggs and vanilla.
2. Combine flour, baking soda and salt. Gradually add to the sugar mixture.
3. Stir in chocolate chips.
4. Bake for 10 to 12 minutes at 375.

I baked the cookies in a mini muffin tin to get the round shape and then pressed the chocolate hearts into the top of the cookies as soon as they came out of the oven.

These were delicious!

I also wanted some festive sugar cookies and was excited to try April's recipe she got from a friend. The cookies turned out great, and my husband's hockey team loved them.

Wednesday, February 13, 2008

Lollipop Flower Valentines


I decided to make my own Valentines this year and found a picture of these on the internet. They looked easy enough, so I tried.


Materials:
Lollipop
Coloured paper
Glue Stick
Whole punch.

How to:
Cut out hearts, Glue to hearts together by the tips.

Punch a hole in the center of where the hearts are glued together. Push the stick of the lollipop through the whole.

Repeat for the next set of heart petals.

Note: On the red flower I folded the petals in to make a more "closed" flower.

The leaves will have each persons name on them and will be a heart taped/glued around the stick/stem.

Monday, January 14, 2008

Calzones

I was looking for something different for supper and came across this in some recipes Owen's Aunt gave me.

Dough:
2 cups flour
1 tsp yeast
1/2 tsp sugar
3/4 cup warm water
2 tsp oil

Fillings:
Anything you want!
We used - pizza sauce
pepperoni
chopped spinach
chopped onion
chopped green and red pepper
shredded chedder cheese
chopped tomatoes

1. Mix the warm water, yeast and sugar together in a boil. Let the yeast "foam" for 10 minutes.
2. Add in the oil and flour. Mix/knead into a dough.
3. Let rise for 1 hour.
4. Divide into 8 or 4 balls of dough, depending on how large you want the finished calzone to be. Dividing it into 8 balls, roll each ball out into a 3-4inch circle.
5. Onto each circle put in the desired toppings.
6. Fold over and seal using water and pinching the edges together with water.
7. Brush or spray the top of each calzone with oil/butter. Sprinkle with italian spices and parsean cheese.
8. Bake 20 minutes at 350F, if a browner outside is desired broil for 1-2mintues.

Enjoy.


This were delicious and I the batch was big enough that Owen had leftovers for lunch! I look forward to making these again and trying different fillings such as spinach and ricotta cheese!

Sunday, January 13, 2008

Ham and Potatoe Soup

It got cold, and I love a good soup when it starts to gets chilly. This recipe by ELLIE11 on allrecipe.com had lots of great reviews, so I though I would give it a try. It was some of the best soup I have had in a long time, our friend and Owen love it! We are planning on making this again this week when we have some friends over for supper. This is fast on it's way to becoming a family favourite.

INGREDIENTS
3 1/2 cups peeled and diced potatoes
1/3 cup diced celery
1/3 cup finely chopped onion
3/4 cup diced cooked ham
3 1/4 cups water
2 tablespoons chicken bouillon granules
1/2 teaspoon salt, or to taste
1 teaspoon ground white or black pepper, or to taste
5 tablespoons butter
5 tablespoons all-purpose flour
2 cups milk

HOW TO
1. Combine the potatoes, celery, onion, ham and water in a stockpot. Bring to a boil, then cook over medium heat until potatoes are tender, about 10 to 15 minutes. Stir in the chicken bouillon, salt and pepper.
2. In a separate saucepan, melt butter over medium-low heat. Whisk in flour with a fork, and cook, stirring constantly until thick, about 1 minute. Slowly stir in milk as not to allow lumps to form until all of the milk has been added. Continue stirring over medium-low heat until thick, 4 to 5 minutes.
3. Stir the milk mixture into the stockpot, and cook soup until heated through. Serve immediately.

I didn't change a thing from the original recipe and it was amazing. However next time I may add some shredded carrots to give the soup a little more colour.

Jerk Chicken


I was looking for a tasty new recipe for my chicken breasts when I stumbled across this recipe (faux jerk chicken by BETHMCAFEE. It looked easy enough, so I thought I would try it - with a few substitutions with what I had on hand rather than what they called for. It made the house smell delicious, and turned out great - definatley a keeper.

INGREDIENTS
1/3 cup olive oil
3 tablespoons white vinegar
1 1/2 tablespoons lemon juice
1 tablespoon white sugar
1 teaspoon dried thyme leaves
3/4 teaspoon ground allspice
3/4 teaspoon cinnamon
1/2 teaspoon salt
1/3 teaspoon ground cayenne pepper
1/4 cup finely chopped Hot Jalepanoe Slices (in a jar)
1/4 cup finely chopped onion
2 cloves garlic, finely chopped
4 skinless, boneless chicken breast halves

HOW TO
1. In a dish large enough to fit all the chicken breasts mix the oil, vinigar, lemon juice, sugar, thyme, allspice, cinnamon, salt and cayenne. Then stir in the Jalepanoes, onion and garlic.
2. Poke the chiken breasts on all sides with a fork before placing them in the marinade. Leave in the fridge for 24 hours.
3. Preheat the grill for med-high heat.
4. Grill until the breasts are cooked.

Note - I used my George Forman grill on medium heat and it was delicious! Review for the recipe says it also turns out well if baked in the oven at 350F for 1 hour.

We all loved this dish, and I look forward to making it again!

Cake - In a Jar!


Apple Cake in a Jar

This Christmas I had decided to do some cookie mixes in jars as presents for some of my friends and I came across this idea - cake that is baked and sealed in a jar. It looked like lots of fun and with Owen starting a new job - I thought these would be interesting to send with his lunchs. I found both recipes here on allrecipes.com, but changed the amounts to use 1/2 pint jars and make smaller batches as I was testing the recipes.

If doing this, remember to boil the jars you will be using for at least 15minutes before adding the batter, and boil the lids before putting them onto the jars. The rims need to be to allow the jars to seal.

!. Chocolate Cake - This was supposed to make 2 regular jam jars (1/2 pint) but I had enough batter to make 3.
INGREDIENTS
1/2 cup all-purpose flour
1/2 cup white sugar
1/4 teaspoon baking soda
1/4 teaspoon ground cinnamon
2 tablespoons and 2 teaspoons butter
2 tablespoons water
1 tablespoon and 1-1/2 teaspoons unsweetened cocoa powder
2 tablespoons milk
1/2 egg, beaten
1/4 teaspoon vanilla extract

HOW TO
1. Sterilize 3 (1/2 pint) straight sided wide mouth canning jars, lids and rings by boiling for 10 minutes. Keep the lids and rings in the hot water until needed. Preheat oven to 325 degrees F (165 degrees C)
2. In a small bowl, mix flour, sugar, baking soda and cinnamon. Set aside.
3. In a medium saucepan, combine butter, water and cocoa powder. Heat and stir until butter is melted and mixture is well blended. Pour into a large bowl.
4. Stir in Flour mixture and blend. Add milk, egg and vanilla and beat by hand until smooth.
5. Distribute evenly into the 3 prepared canning jars(Be sure not to fill the jars more than 1/2 full or the cake will rise above the rim).
6. Place the jars on a cookie sheet and bake at 325 degrees F (165 degrees C) for 35 to 40 minutes or until toothpick inserted deep into center of cake comes out clean.
7. Using heavy oven mitts, remove cakes from oven one at a time. Place a lid, then a ring onto the jars and screw them down tightly. Place the jars on the counter and listen for them to "ping" as they seal. If you miss the "ping", wait until they are completely cool and press on the top of the lid. If it doesn't move at all, it's sealed.

Thanks to Holly and allrecipes.com for this recipe - It was delicious.

2. Apple Cake - This makes 4 regular jam jars (1/2 pint)
INGREDIENTS
2 tablespoons and 2 teaspoons butter
2/3 cup white sugar
1 eggs
1/4 teaspoon ground cinnamon
1/8 teaspoon ground nutmeg
1/4 teaspoon salt
1/2 teaspoon baking soda
3/4 cup all-purpose flour
2 tablespoons and 2 teaspoons water
3/4 cup grated apple
2 tablespoons and 2 teaspoons raisins

HOW TO:
1.Preheat oven to 325 degrees F (165 degrees C), sterilize the jars by boiling them in water.
2. Sift together flour, baking soda, salt, nutmeg and cinnamon. Set aside.
3.Cream butter and sugar. Add eggs and beat in well. Add flour alternately with water and mix until smooth. Fold in apples, raisins.
3.Fill jars 1/2 full of batter, being careful to keep the rims clean. Wipe off any batter that gets on the rims. Bake at 325 degrees F (165 degrees C) for 30 minutes. While the cake is baking sterilize the lids and rings in boiling water.
4. As soon as cake is done, remove from oven one at a time, wipe rims of jars and put on lid and ring. Jars will seal as cakes cool. Place the jars on the counter and listen for them to "ping" as they seal. If you miss the "ping", wait until they are completely cool and press on the top of the lid. If it doesn't move at all, it's sealed. Jars that do not seal should be kept in the fridge and eaten within a few days.

Jars should be eaten or kept in refrigerator for up to a week.

Thanks to Julie Wayment and allrecipes.com for this yummy creation.

Thursday, January 10, 2008

Homemade "Oreo" Cookies


I have no idea were I got this recipe from or if I have tweaked it over the years, but it is a friend favourite and I am always getting asked for them. So goes this "recpie"

Ingredients:
1 chocolate (devils food) cake mix
eggs (the nmber required for the cake mix, usually 2 or 3)
Oil (the amount specified on the cake mix box)
Your favourite icing

How to:
1. Heat the oven to 350 degrees F.
2. Place the cake mix in a bowl and use a fork to remove all the clumps from the mix.
3. Add the eggs and oil to the mix and mix into a batter, trying to get out as many of the clumps of mix as possible.
4. Drop batter onto a cookie sheet and bake for 10-12 minutes (the cookies will be poofy, but a toothpick will come out clean).
5. Let cool on a wire rack.
6. Once cool match the cookies to cookies that are of a simular size. Put icing on one half and top with the other cookie.

These cookies are super good and they never last long. My BIL always hids any he gets to keep them away from his brothers, and now it is starting to become a "tradition" that we make these cookies together when we see each other. Below is my BIL putting the icing on the cookies we made over the holidays - this entire batch disapeared into his room shortly after this.

Christmas Fun

So, it has been a while since I updated, due to the fact that I just came back from 3 weeks of holidays. Before leaving Owen and I finished our gingerbread house. This is my first attempt at making a gingerbread house from scratch. My cutters were a little bent so it was fun trying to get the house together with minimal gaps, but I would say it didn't turn out too bad.

After that adventure was a dinner with friends followed with frantic cleaning and leaving for BC at 4am the next the morning. BC was great and it was either snowing or sunny the entire time we were there! It was the perfect while christmas with all the snow, and I felt like a little kid again. In true small child mode, I decided it was time to make a snowman, and after shovelling the driveway Owen decided he had enough snow to make a snowcave.

And finally - presents. I recieved a number of cookbooks this year and am really excited to start trying the recipes. But the best present this year was the t-shirt that I recieved from Owen - it really does suit me!

I love it, and the material is super soft. It was definately one of my favourite gifts this year. I hope everyone had a good holidays and a happy New Year.