Sunday, November 29, 2009

Roast Rice Milanese


I got this recipe out of the Companies Coming Rookie Cookbook. It is delicious, and I have played a little with it to make it a little more versatile. This recipe is great and it is what I always plan for the day after having roast for supper.

I have made this and had it turn out great with both beef and venison. Also instead of using roast leftovers, I have finely chopped stew chunks and fried the small chunks.

Ingredients
1 cup uncooked long grain white rice
1 small onion (finely chopped)
¼ cup margarine (Don’t use butter, it will brown too fast)
1 cup meat, coarsely chopped (beef, venison, moose roast or fried stew meat)
2 ½ cups water
1 tbsp beef bullion
¼ tsp pepper (Owen likes a little more, go with what you like)
1 tbsp Parsley flakes
1/3 cup grated Parmesan cheese

Directions
*. If using stew chunks or other uncooked meat, fry them until cooked in a fry pan on medium high heat. You can either remove them when cooked or leave them to cook a little with the rice and onion.
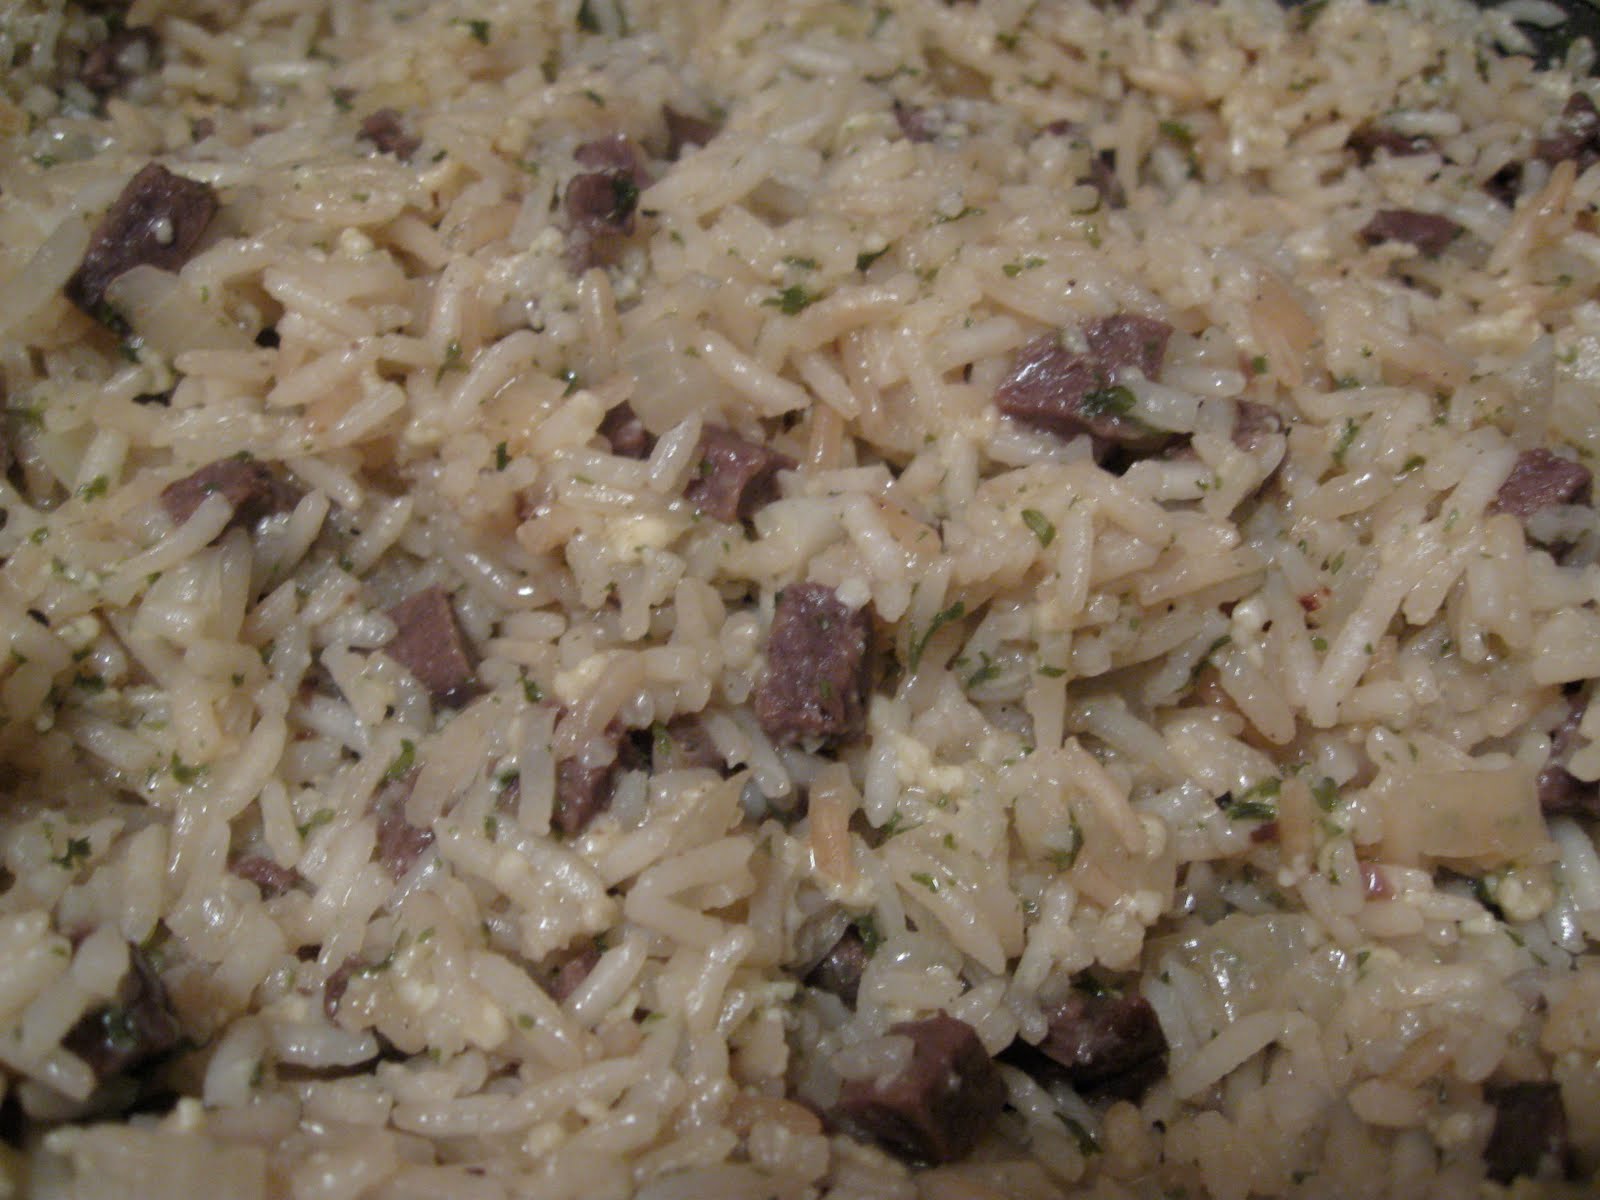
1. Combine the rice, onion and margarine in a fry pan over medium high heat and sauté until the rice and onion have a golden colour.
2. Add the meat, water, beef bullion, pepper and parsley. Bring to boil and reduce heat to medium low. Cover and let simmer until the rice is tender (about 15 minutes).
3. Stir in the parmesan cheese and serve.

Reviews:
I like this as a quick meal and it is one of Owen’s favorite. When I first started making this dish, he asked for it at least once a week and I had to double the recipe when I made it.

I like to put some roast leftovers chopped and measured into the freezer, then I can thaw it as I brown the rice and supper is done in 20 minutes!

Thursday, November 26, 2009

Pasta at Home


Homemade Pasta
I love puttering in the kitchen once in a while. One day it was cool outside and I wanted a yummy meal and felt like spending a little time working on it. I was going through blogs and stopped when I came to Pastor Ryan’s Bolognese sauce on Pioneer Women. This looked deliscious, and part of that was the homemade pasta. I knew this is what I wanted.
Now making pasta really isn’t very hard, especially with only 2 ingredients. However, it can take a little time and patience to roll it out thin if you don’t have a pasta roller/cutter (which I do not).
Ingredients (per person)
1 egg
½ cup flour

How too:
1. Make a well in the center of the flour and drop the eggs into the well.
2. Mix by hand until the dough comes together, then knead on a floured surface until you get a smooth elastic dough.
3. Shape the dough into a ball and let rest for about 30 min. (or store well wrapped in the fridge for a day or two).
4. Roll the dough as thin as possible. I often will hang it over the back of a chair, or the side of the counter and let it stretch itself thing as well.
Cut into thin strips, keeping the strips separated so they do not stick and form a clump.
5. To cook, drop the noodles into boiling heavily salted water. They will only take 1 -2 min to cook (generally when they are all floating, they are done).
I sprinkle mine with a little bit of italiano seasoning after taking them out of the pot.

Reviews:
I love homemade pasta, O thought they were great and so did our friend. I was snacking on them even without the sauce (recipe to come later).

Sunday, November 22, 2009

Slow cooker Venison Roast


Friends of ours were coming over for dinner and while looking through my freezer for the pheasants (my original meal plan) I accidently tore the wrapping on a roast. I didn’t want it to freezer burn or anything so the plan changed – I was cooking roast. I was not upset by the change as the roast is a lot less work and I already had a great plan for the leftovers.
I let the roast thaw overnight and the next day I threw it into the slowcooker with a few ingredients. All that was left before supper was to make mashed potatoes and cook the beans, which gave both my husband I more time to visit with our friends.
Slow Cooker Venison (slightly adapted from Allrecipes)
Ingredients:
1 2-4 lb roast
1 onion sliced
1 tbsp soy sauce
½ tbsp worcestershire sauce
½ tbsp garlic salt
½ tsp ground black pepper
1 pkg onion soup mix (like lipton)
1 can cream of mushroom soup
2 tbsp flour
¼ cup water

Directions:
Place the roast in the slow cooker and cover it with onions, soy sauce, Worcestershire sauce garlic salt and pepper.
In a bowl mix together the onion soup mix and the mushroom soup. Pour it over the roast.
Let the roast cook on low for 6-7 hours, until the internal temp is 140F to 170F. A lot of this will depend on the size of your roast and how well you like it done
Remove the roast and slice on a cutting board. While it is resting(before cutting) strain the onions (if you wish) from the liquid. Mix the water and flour to form a slurry, and pour into the liquid to make a gravy. This will be a thin gravy but thickens a little as it cools. However, it is delicious.

Reviews:
This was a great supper, it really didn’t take much effort at all and the meal was enjoyed by everyone – even our friend who doesn’t eat much (if any) red meat (Don’t worry I cooked a tuna steak for her – recipe to come later).

Saturday, November 21, 2009

“Red” Chocolate Cookies


The bulldogs played last night, and that means cookies. I took suggestions this week, as I wasn’t really sure what to do. What I got from the boys on the team was “chocolate something”. When Owen saw this, he suggested trying beet cookies – remembering the beet cake I had made a couple months back.

For this I wanted something with a lot of chocolate flavour, and more of a brownie feel. I found a beet brownie recipe, mixed it up and cooked ½ as brownies to see what they came out like. Then I got down to some modifying of the cookies until I ended up with something I thought I could feed to people.

“Red” Chocolate Cookies – makes 2-3 doz cookies.
Ingredients
¼ cup butter
2 oz chocolate (70 to 80% cocoa)
2 eggs
1 ½ cup brown sugar
½ cup applesauce
½ cup beets
2 ½ cups flour
¼ cup coco powder
¼ tsp nutmeg
½ tsp cinnamon
½ tsp baking powder

Optional Additions
Mini marshmallows
White chocolate chips

Directions:
1.On the stove melt the butter and chocolate together. Let it cool a little while you beat the eggs until they are light and foamy.
2.Add the sugar and vanilla to the eggs, beating before adding the chocolate mixture, applesauce and beets. Beat until well mixed
3.Stir in the flour, spices, baking powder and cocoa powder.
4.Fold in the mini marshmallows and chocolate chips if you so choose.
5.Drop by full teaspoons onto a baking sheet (I lined mine with parchment paper and had no problem with sticking).
6.Bake at 350F for about 10 minutes. Cool on a wire rack.

Reviews:
Both versions of the cookies got great reviews (with the marshmallow and chips, and without), and surprisingly the hockey team seemed to go for the plain ones. Apparently they were a little unsure of the puffed up and cratered marshmallows.

I will say this, there is still a little bit of a beet taste to the cookies. Most people didn’t notice until they were really thinking about it trying to guess what the “secret” ingredient was. However if you are not a fan of beets (like me) and you know it is there, these may not be your favorite cookie.

Bulldogs:
They won the game 9-7, and have a 4 game winning streak! Apparently the cookies are working (riiiiiight).

This week, I asked the boys what cookies they would like next week and got the following instructions:
Novembery
Frosted Flakes
Caramel
Marshallow
“monster” cookies (he didn’t know that this was actually a cookie)

If any of you can come up with a cookie idea that combines those instructions, I would very grateful.

Friday, November 20, 2009

Stuffed Manacotti

When I have some odds and ends in the fridge I feel like using I generally tend to make manacotti. I don’t follow the traditional recipe, or any recipe for that matter and it turns out a little different each time. I love experimenting with the different flavors and the tasty combinations that come out of it. I am going to share with you some of the most common mixes that I use, to which I will usually add whatever odds and ends of veggies and cheeses I have in the fridge.

The reason I am sharing this? I am slowing becoming obsessed with freezer meals. These make a fantastic freezer meal, just stuff the shells and freeze. Then when you want to eat them you can pull as many out as you would like, put them in a dish, top with some sauce and cook. You could freeze them as a ready to go in the oven dish as well, but I find freezing individually gives me more flexibility.

I am sorry for the lack of amounts for these recipes, but I just toss things into a bowl and then stuff as many shells as I can with what I have. Make the mixture look right to you and your family’s preferences.

Chicken Alfredo Manacotti

Ingredients:
Cooked chicken (this can be breasts that have been cubed or shredded, or ground chicken, or even turkey)
Ricotta cheese (you can substitute cottage cheese if you want)
Veggies, finely chopped (I love using greens with this, green pepper, broccoli, spinach)
1 box manacotti noodles
Alfredo sauce*
Cheese for topping (cheddar, mozza, swiss, Parmesan)*

Spinach Manacotti:
Ingredients:
Ricotta (or cottage) cheese
Chopped baby spinach (or frozen chopped spinach)
Manacotti noodles
Pasta sauce (I use a can of tomato sauce, with Italian seasoning added to it)*
Cheese to top (cheddar, mozza, parmasan ect).*

Sausage Stuffed Manacotti
Ingredients:
Cooked chopped sausage (or ground sausage filling cooked, ground beef cooked)
Ricotta cheese (or cottage cheese if you prefer)
Veggies finely chopped (shredded carrot, zucchini, peppers, onion, spinach ect)
Manacotti noodles
Pasta sauce (or tomato sauce with seasonings of your choice)*
Cheese to top*

* if you are freezing individually, you will not need these ingredients until you are ready to cook the dish.

Preparation

1.In a bowl mix together the ricotta cheese, veggies and meat. If it looks a little dry you can add a tbsp or two of the sauce.
2.In a large pot cook the manacotti to eldante, if you overcook them they will split and be a little harder to work with. We will be baking this, so they will soften up more.
3.Using a small spoon (teaspoon) spoon the filling into each of the cooked noodles. Place the noodles in a casserole dish if you wish to cook them for supper (or freeze as a put together dish), or on a cookie sheet to freeze.

To cook:

1.Take the stuffed pasta out of the freezer and let thaw a little, in a casserole dish.
2.Pour the sauce over the stuffed pasta, and sprinkle cheese on the top.
3.Bake at 350F for 20-30 minutes (if they went in frozen you may have to cook them a little longer. If they look like they are getting a little dry, cover them). The cheese on top should be bubbly and the manacotti should be hot through.

Thursday, November 19, 2009

Shanghi Casserole


This recipe came from my mother in law (I have changed it a little, as I am not feeding 3 growing boys), and was requested by Owen. I have come to love the flavored rice and the crunch of the “noodles” on top. It is made at least once a month in our house (that is about as often as anything is made around here with the exception of spaghetti).

About the name, I am really not sure why it is called Shanghi Casserole, but that is what O always calls it, and that is what it says on the top of the recipe his mom sent me.

Shanghi Casserole
Ingredients:
½ lb ground beef
2 stalks celery
½ med onion
1 can cream of mushroom soup
¼ cup milk
2 tbsp soy sauce
1 ½ cup uncooked rice
2-3 cups Chow mein noodles (the dry crunchy ones)

Directions:
1.Put the rice on to cook (I have a rice cooker for this, but go with however you normally cook rice). While the rice is cooking brown the meat and sauté with the onion and celery until the vegetables are soft.
2.Combine the milk, soup and soy sauce in a separate bowl
3.When everything is ready drain the fat off the meat and combine the meat, rice and soup mixture in a 3 quart casserole dish.
4.Bake at 350F for 20 mintues. Remove the casserole and top with the noodles, pressing them into the rice mixture a little. Bake for another 10 minutes.
5.Enjoy.

Freezer Meal:
I will most often cook up twice the amount of meat and veggies I need for this and freeze ½ of it. Then all I have to do when I come home is throw some rice in the rice cooker and mix everything together and bake (providing I remembered to take the meat mixture out of the freezer that morning to thaw). I am sure it would also work if you froze everything mixed, just undercooked the rice a little ( I will halve to try this soon).
Reviews:
This is a standby in our house and it starting to become comfort food to me. I don’t know what is about mushroom soup flavoured rice, but I love it. O has eaten this since he was young and still loves it.

Tuesday, November 17, 2009

Berry White Chocolate Cookies


I had a potluck to go to and wanted something new to take. While out for breakfast with a friend I saw that the day’s muffin was a white chocolate blueberry. Naturally while eating breakfast I started mulling, something was tickling my brain. Later that afternoon it clicked that it would be a great cookie flavour, and upon some more thinking I reasoned almost any berry would go well in a white chocolate chip cookie.

The recipe search began, and I didn’t find one I liked. They all used to many flavors (I am sure they were delicious but I wanted something simple and quick) and dried fruit. So I got to work modifying a chocolate chip cookie recipe (I wanted a nice light chewy cookie base). The outcome has received great reviews, however I can not get a consensus on which fruit was better.

Berry White Chocolate Cookies (makes about 2 doz)

Ingredients:

½ cup butter (soft)
½ cup brown sugar
¼ cup white sugar
1 tsp vanilla
1 egg
1 cup flour
½ tsp baking soda
½ cup white chocolate chips
Fresh berries (I used raspberries and frozen blueberries)

Directions:

1. Cream the butter and sugars together until fluffy. Add in the vanilla and egg, beating until well mixed.
2. Slowly add in the flour and baking powder until mixed
3. Fold in the chocolate chips.
4. Spoon cookies onto a baking pan using teaspoons. Once they are on the pan poke berries into the top of the cookie – as many as you want. For larger berries (raspberry, blackberry ect) you will want to ½ or ¼ the berry first.
5. Bake at 375F for 10-12 minutes, until the middle is set and the edges are turning a nice brown.
6. Cool on a wire rack.

Variations:
If you would like a fluffier cookie use 2 eggs and 1 1/4 cup of flour. This variation has also gotten rave reviews.

Use any berries you would like with any combination of chips that you think would be good. Raspberry with a dark chocolate may also be good. Use you imagination.

Reviews:

These cookies were a real hit, everyone seems to have liked them so far. They won’t keep long with fresh berries, but they aren’t many in the batch so them disappearing should be no problem.People just can't seem to leave them sit on a a table too long.

I am looking forward to trying out other berries in them and dried or frozen berries during the winter! (I have a feeling these cookies are going to be made a few times).

Sunday, November 15, 2009

Chewy Apple "crisp" Cookies - Bulldogs Week 2


The bulldogs played on Friday night, and for this week I decided to try my hand at making a recipe of my own without modifying other recipes. I knew I had a bunch of apples that I needed to get rid of and decided to try making a cookie that would be reminiscent of apple crisp. I started tossing things into my mixer and looking for the right consistency. Once I thought I might have it, I would bake up a cookie, test it and then add more as needed. I think we ended up with 4 or 5 versions of this cookie in various stages before I was done.

Apple “Crsip” Cookies – makes about 2 doz depending on cookie size

Ingredients:
½ cup brown sugar
¼ cup butter
¼ cup + ½ cup applesauce
1 egg
1 tsp vanilla
½ cup all purpose flour
½ cup whole wheat flour
¼ tsp baking powder
2-3 tsp cinnamon (depending on how much you like cinnamon)
½ tsp nutmeg
1 sm to med apple chopped
1 sm to med apple grated (just use a cheese grater)
1 ½ cup large flake oats

Directions:
1. Beat the sugar and butter together until fluffly. Add in ¼ cup of apple sauce, egg and vanilla.
2. Add in the flour, cinnamon, nutmeg and baking powder and mix until just mixed.
3. Fold in the Apples, oats and the last ½ cup apple sauce.
4. Spoon with teaspoons onto a baking sheet (I cover mine with parchment paper and they didn’t stick at all), and sprinkle the tops with a touch of brown sugar (1/4tsp ish).
5. Bake at 350 For 12-14 minutes, the cookies with be a bit spongy when done, but will hold their shape when touched.

Reviews:
Oh wow did this ever make the house smell like apples! They smell was great and the cookies packed a great deal of apple flavour into them. Owen did say they tasted a bit like an apple crisp (which is what I was going for, so woo hoo for me). The cookies are super moist and don’t need to be stored in an airtight container which is nice – you can leave them sit out for quite a while.

The boys apparently really enjoyed the cookies and I didn’t end up with any leftovers.

"Those apple pie cookies (worth at least a few goals) were good" Team Captain


Game Score:
The Bulldogs won 6-1 for their game, way to go boys!

Monday, November 9, 2009

Mars Bar Brownies


I admit it, my favorite part of Halloween is the cheap minature candy for the days after Oct. 31. This year I hit the stores and came home with a large box of mini mars bars. Why didn’t I get a box that had a few kinds in it? I don’t really know, but that large box of mars bars called to me, it wanted me to bring it home.

So now, rather than just chew my way through the box of 70 chocolate bars in the weekend, I decided maybe I should try and do something with them. The natural and most obvious choice was Brownies.

Mars Bar Brownies:

Ingredients:
½ cup margerine (1 square)
1 cup brown sugar
1 egg
1 tsp vanilla
1/3 cup cocoa powder
½ cup all purpose flour
about 12 mini mars bars

How to:
1. In a saucepan melt the margerine., remove from heat.
2. Add the brown sugar and stir until smooth. Check to make sure that the mixture is now cool enough that it won’t cook the egg, if it is too warm let it sit for a minute.
3. Add in the egg and vanilla, mixing until smooth.
4. Add the flour and cocoa powder, mixing until just mixed.
5. At this point you could cut up the mars bars and add them in, but I decided to go a more interesting route. I poured just enough batter to cover the bottom of my 8x8 pan, then set the bard in lines in my pan.

I then marked the edges of the bars, and covered them with the remaining batter.


6. Bake at 350F for 20 mintues, they will still be very gooey when removed from the oven, don’t worry about it. Let cool in the pan for 5 -8 mintues them remove to a wire rack (I like the parchment paper for this as you can just grab the sides and pick the brownies out of the pan.).
7. Once the brownies are cool, but at the marked lines. Hopefully the bars didn’t shift and the brownies will look like a fudgy brownie along the cut lines. Then when you bite into the middle, you get a caramel and nugout surprise!

Reviews:
I love these brownies, I hate easily ½ the pan of these in a single sitting. I could not stop myself from picking up a new one everytime I went near the kitchen. O said they were allright, but a little too rich for him as he wasn’t able to sit down and eat a bunch of them all at once.

Thank You Edible Arrangements!


Edible Arrangements is a fun company that make boquets out of fruit. I have been drooling over these arrangements for a while now, but haven't had an excuse to actually order one other than I want to try it. However, after a recent promotion, I managed to get a coupon for a free small box of fruit! Sweet, I can try it now, in a small form - I don't have to get a big arrangement that I might not finish.

Owen was nice enough to pick up my box last week on his way home. I ended up with 2 chocolate dipped apple slices, 2 chocolate dipped orange slices and 2 chocolate dipped strawberries.


The rulings: I love these. I polished off all the fruit quite quickly and the only way that Owen was able to get his hands on any was to sneak it from me as I was doing something else (I don't share fruit well..). I will be ordering from them in the future (even if I just eat it all myself).

Thank you to Edible Arrangements for my free fruit, and if you haven't hear of them you should check it out.

www.ediblearrangements.com

Saturday, November 7, 2009

Chocolate Cookies with a Twist - Bulldogs Cookies


Alright, I know these sounds gross and weird. Right now many of you are probably wondering were I left my brain before trying this, but seriously they are great. Trust me, I know my chocolate!

Anyways, over the summer, one of the guys on the Bulldogs had mentioned Chocolate Sauerkraut Cake to me after eating one of my other baked goods with veggies in them (chocolate zucchini loaf and chocolate beet cake). I didn’t think much of it until I was reading Cream Puff Murder by Joanne Fluke, and she had a recipe for “Don’t ask, Don’t tell Cookies”. Upon seeing this, I knew what the bulldogs would be getting for cookies. Off course I made some changes (I really didn’t need 8 dozen cookies).

Chocolate Sauerkraut Cookies

¼ cup soft butter
1 ½ cup sugar
2 eggs
1 tsp vanilla
½ cup cocoa powder
½ tsp baking soda
½ cup soured milk (take regular milk and add ~1tsp lemon juice, leave for a minute)
2 ½ cups flour
1 cup drained sauerkraut

Directions:
1. Place the sauerkraut in a colander and rinse, rinse it very well! You should only have a faint smell if any of the brine left when you are done rinsing. Transfer to a cutting board or food processor and finely chop ( you want this to be a very fine chop or you will find large chunks in your cookies).
2. In a bowl beat the butter and sugar together until fluffy. Add the eggs, one a time until well mixed.
3. Mix in the vanilla, cocoa powder and baking soda until well combined.
4. Add ¼ cup of milk and 1 ¼ cups of flour. Allow to mix and add the remaining flour and milk.
5. Measure a packed ½ cup of chopped sauerkraut form step 1 (this should be pretty much all of it) and pat dry with a paper towl (don’t worry about it getting it perfectly dry, you just want to remove some of the water). Add to the chocolate batter and stir.
6. Drop the cookies using teaspoons onto a cookie sheet. (this is a fairly “runny” dough, as far as cookie dough goes). Bake at 350 for about 10-11 minutes. Let cool on the cookie sheet for 1 minute before moving to a wire rack.

These cookies taste pretty much like a cake, and have the same “fluffy” consistency of a cake. O figured they needed a little more flavour, so I added the frosting as suggested by Joanne Fluke (with some modifications).

Mocha Chocolate Frosting
Ingredients:
½ cup chocolate chips
1 cup icing (powdered) sugar
1/6 cup margerine
4 tsp strong coffee

Directions:
1. In a microwave safe bowl melt the chocolate chips with 2 tsp of coffee. (Microwave for 30 seconds, stir, microwave 20 seconds stir, repeat until all chips are melted).
2. Add in the margerine and stir until it is all melted and combined.
3. Add in the icing sugar and stir. This will make a very thick mixture and you may have to add the additional 2 tsp of coffee to thin it out so you can spread it (and it adds a it more of the yummy coffee flavor).
4. Spread on cookies while warm.

This icing is a very fudgy icing, and the way I made it, it hardened on top kind of like a royal icing which allowed me to easily stack the cookies without worrying much about the icing.

Reviews:
The combination of the chocolate cake like cookies and the mild coffee in the icing was great. No one guessed there was sauerkraut in the cookies, and some people didn’t believe it when told. All in all they were a big hit.

The Game Score:
Now for the important bit – they Bulldogs won the game 4-2! (O even managed to score a goal) Way to go Bulldogs.

The Bulldogs next game is November 13th (yes, that is Friday the 13th folks). So look for an update next weekend.

Bulldogs and Cookies


Owen loves hockey - he watches hockey and he plays hockey, on two teams. There is a lot of hockey in our house. One of the teams he plays on is the Bulldogs. This team has somehow gotten it into their heads that they need cookies before the game to win (really I think this is a big excuse to eat cookies). I figured I would get it out of their heads and sent cookies during a losing streak, well they won and have continued to win as I continue to send cookies - this is just a coincidence right?

Well, as I am now sending cookies almost weekly, they have graciously become my guinea pigs for new recipes. This actually works out well, as now I don't have to try and find something to do with a bunch of cookies so I can bake something new, after sending them to hockey I usually only have about a dozen left in the house for the week - perfect.

The reason I am telling all of you this? I am going to start a weekly (or there abouts) update on the cookies I make for the dogs and how they are doing. Should be an interesting season for us all!

I hope you enjoy at least some of the recipes - the guys really are good sports about what I send.

Upcoming Bulldogs update: Chocolate surprise cookies.

Thursday, November 5, 2009

Slow Cooker Chili


My husband loves beans, and he is a fan of a good chili on a cold day. I love doing it in the slow cooker, It doesn’t require a lot of work on my part, and the flavors have lots of time to mix together and become something delicious. This is approximations, as when I cook chili there is a lot of tossing in random vegetables out of the fridge, tasting and adding spices depending on my mood that day.

Ingredients:
1 onion
2 stalks celery
1 lb ground meat (I used ½ lb beef and ½ lb venison as they were the first things I grabbed)
1 can crushed tomatoes
1 can tomato sauce
2-3 cans beans (I used all kidney this time, but sometimes I add navy beans as well)
peppers (doesn’t really matter what kind, use what you like best)
2-3 small hot peppers
grated carrots
1 can corn nibblets
2 tbsp chili pepper
2tbsp cup cumin
1 tbsp Italiano seasoning
garlic, salt and pepper to taste

Directions:
1. Brown meat with the celery and onions. Rinse off the beans.
2. Combine everything in the crockpot and cook on low for 8-10 hours. I always taste it when I get home and add any extra spices I think may help (more cumin, more chill powder, more tomato sauce ect) and then let it finish cooking – this works well as I get home around the 8.5 hour mark.

This is also fantastic as a vegetarian meal – just don’t add the meat. It has gone of really well with both meat eaters and vegetarians alike. Owens favorite serving method is in a bread bowl (well he likes most things in a bread bowl). The bread bowls here are from the Italian bread bowls My Kitchen Café.

Monday, November 2, 2009

Halloween 09

Well, Halloween has over for another year, all that is left is some finger cookies and the disassembled pieces of our costumes. I let Owen pick the costumes this year, and he decided to go with a couples costume. He found a picture and we got to work making them. It only took 1 black sheet, 1 pillow case, a cardboard box, shelf paper, duct tape and some iron on hemming.


The costume was a hit at the party we went through, and it was one of my favorite costumes to wear of all time! It was so very comfortable!

I did end up doing doing a small pumpkin for my apartment in my window, and the kids playing on the lawn loved it! They were all coming up to the window to check it out. I did this one freehand, so it isn't as fancy as the dog I did at my parent's.

In the window:


Up Close:


Hope you all had a great Halloween!