Showing posts with label main dish.. Show all posts

Thursday, February 9, 2012

Creamy Jalapeno Chicken


I needed something new and interesting for supper this week to get myself out of the rut I have been in lately. When I came across a recipe for Jalapeno Chicken on How Sweet Eats, I knew this was perfect as I love jalapenos. There isn't a lot of color in this dish (veggies on the side sort of make up for this) but it is very tasty.

Creamy Jalapeno Chicken

4 boneless, skinless chicken breasts
2 tablespoons sunflower/safflower oil
2 jalapenos, seeded and chopped
1 shallot, sliced
2 garlic cloves, minced
2 tablespoons butter
1 tablespoon flour (any kind will do, I used whole wheat)
1/4 cup skim milk
1 12-ounce can fat-free evaporated milk
2 tablespoons finely grated parmesan cheese

1.Finely chop the jalapenos, onions and garlic. This is easiest done with a food processor, just give it a couple of pulses and you are done. Keep these for later.
2.In a pan, heat the oil and add the chicken breasts (seasoned with salt and pepper if you would like). Cook the chicken for 8 to 10 minutes a side, the chicken should be cooked through and browned on the outside.
3.While the chicken cooks, add the butter to a small saucepan on medium heat. Cook the jalapeno/onion/garlic mix for 2-3 minutes (will the a little soft and fragrant).
4.Add the flour to the butter vegetable mix and stir (the butter and flour will become a thick paste) and cook for 1 minute.
5.Slowly whisk in the milk and evaporated milk to the butter/flour/vegetable mixture, allowing it cook and thicken. Cook for 6 to 8 minutes until thick and add the parmesan cheese. If you want it to be a thicker sauce, turn the heat to low and leave it cook for a couple more minutes.
6.To serve, place sauce on the chicken.

Reviews:
Yum! I loved this and the sauce was fantastic with rice (I even ate just the sauce on rice for leftovers the next day). This meal will be in my regular rotation of meals from now on, it was easy to make and made a tasty dinner.

Saturday, June 4, 2011

BBQ Pizza


I finally have a yard - after 7 years I no longer have to BBQ on a tiny camping BBQ out my living room window (seriously, this is how I did BBQ for 7 years!). Now I can comfortably stand on my deck and use my real BBQ while enjoying the outdoors. The result is that I have been doing a lot of cooking on the grill lately (which is awesome as my house doesn’t heat up from the oven). I decided to try pizza one day, and was surprised at how easy it was.

Pizza Dough
¾ cup warm water
1 ½ tsp yeast
½ tsp sugar
1 cup white flour
1 cup whole wheat flour
2 tbsp oil

Toppings:
Cheese
Veggies ( I used a red pepper, green pepper and onion)
Meat (I used some fried pepperoni sausage)
Pizza sauce

Method:
1. In a bowl combine the water, yeast and sugar. Let sit for 10 minutes, the mixture should appear slightly foamy as the yeast starts to activate.
2. Add in the flour and oil, combine until it forms a ball. Cover and let rise for about an hour - the dough will about double in size.
3. After the dough has sat for about 30 minutes, start preparing the vegetables. Cut them into strips (makes them easier to work with).
4. In a vegetable basket on the BBQ cook the veggies until they are crisp tender. (about 10 minutes depending on the size of vegetable pieces.
5. When the dough is done divide into 4 equal parts (or 8 if you would like a smaller pizza). and roll out until they are about ¼ inch thick.
6. When you are ready to start the pizzas, but the dough directly on the grill and let them cook for about 5 minutes. when they are done they will easily lift off the grill and will be soft on the top, a little puffy, but firm on the bottom.
7. Remove dough from grill and assemble the toppings on the firm cooked side of the dough.
8. Return to the grill until the dough is finished cooking and the cheese has melted (about 5 to 8 more minutes).

Enjoy.
Reviews:
This is a great way to enjoy pizza in the summer - you don’t have to heat up the oven or the house as all the cooking can be done on the grill. Also the grill gives the pizza dough a bit of a different texture that I love - a little crunch on the outside with a soft yummy inside! The flavor added by BBQing is great. I will be doing this more often this summer as the weather heats up!

The bonus with the smaller pizzas is that everyone can have their own - have them put their own toppings on to make them personalized.

Wednesday, March 3, 2010

Salsa Rice


Salsa Rice

Some days I want something quick, that I don’t really have to think about – this is one of those meals. I love how tasty it is and how easy it is to put together. I originally got the recipe out of a Kraft cookbook and have altered it over the years, as I don’t usually have minute rice in the house. I have also tried to make this a healthy meal, while keeping the cost down.

Ingredients:
½ lb lean ground beef (you could also use ground chicken or turkey)
2 ½ cups cooked brown rice (I use Basmati)
1 ½ cup salsa
1 can corn niblets (drained)
Shredded light Old Cheddar

Directions:
1.While the rice is cooking (however you like to cook rice, I like to through min in my little rice cooker) brown the ground beef.
2.Combine the corn, ground beef, rice and salsa in the sauce pan and let it heat so the corn is hot.
3.Dish up and sprinkle with cheddar to your taste.

Reviews:
This is so tasty and simple that it a great dish to throw together on a busy night. The bonus – my husband can easily make this with little instruction or help for me, which is a great thing if I need to work late. The brown rice gives it a nice flavour that you don't get with the white rice (although it is still yummy).

Monday, February 1, 2010

Lasagna (with Bolognese sauce)


I watched Guy's Big Bite on the food channel one day (seriously big mistake) and they featured a couple of Italian places with amazing looking food. After that I was craving something cheesy and tomato goodness. In that same timespan I found myself on bell'alimento (again, not the smartest plan when I was already craving Italian). As soon as I hit the Lasagna Bolognese I was done. I called O at work, he stopped on his way home to pick me up some cheese as I got to work on the sauce. The result is a mix of bell'alimento's recipe and the ones I saw on the Food Network that week.

Lasagna (made with Bolognese sauce)

Bolognese sauce
fresh pasta dough/ dry lasagna noodles
mozzerela cheese
Bechamel Sauce (recipe below)

Assemble the lasagna.

1.Take the pasta dough from fresh pasta and roll into sheets, or use dry noodles. Cook the dough in boiling water.
2.In a pan layer Bolognese sauce, cream sauce, cheese and top with noodles.
3.Repeat the layers until you have 3 layers of noodles, top with sauces and cheese.
4.Bake at 350F for 35 min. (golden on top)
5.Let sit 15 min before serving.

Note: you could also sprinkle some paresien cheese on the top as well!

Also the Bolognese recipe makes a lot, I got 2 of these lasagnas made in a 9” pan and more for spagetti.


Bechamel Sauce (made enough for 2 9” square pans of lasagna)
4 tbsp of Butter
1/2 cup All Purpose Flour
1 1/2 cups Milk

In a pan melt the butter. Whisk in the flour until it forms a “paste”. Slowly add the milk to the paste and whisking until smooth each time. Once all the milk is in cook for 5 min or so until it thickens.


Reviews:

Oh my, this hit the spot. I almost pulled it out of the oven and started shoveling it in my face before it was done it smelled so good. It was hardy and filling and just good comfort food. I am drooling just thinking about it. This was also a hit with O.

I have one sitting the freezer ready for to bake it in the coming weeks. I am really looking forward to this.

Bolognese Sauce

I have tried a few different Bolognese sauces over the last year or two, trying to find one that I loved. I have eaten at a couple of places that have tasty ones, so I kept trying. While browsing one day I came across bell'alimento, and here delicious looking Ragu alla Bolognese. I knew I had to try it.

I have made a couple of changes, as I was looking for something with a little more tomato in it (also requested by O) that day, but the original sauce is also amazing! I highly suggest checking it out, and all her other yummy looking recipes!

Bolognese Sauce

Ingredients:
2 tbsp Extra Virgin Olive Oil
2 carrots - peeled & minced
2 stalks of celery - minced
1 clove of garlic - minced
1 onion - minced
1 6oz can of tomato paste
2 cups red wine (I used a Shiraz)
1 ½ lb of ground beef
½ lb of ground venison (or beef)
water
s/p
3 cans tomato sauce

Directions:
1. In a large, deep pan, heat the olive oil over medium heat.
2. Once hot add the carrots, celery, onion and garlic. Saute on low heat for 20 to 25 min. The veggies should be soft and tender. Don’t forget to stir it once in a while.
3. Add the meat, salt and pepper. Cook until the meat is brown through.
4. Add the tomato paste and brown for 5 minutes. Add the wine and allow to reduce by half (10-20 min).
5. Put enough water in the mixture to cover the sauce by 1”. Let the sauce simmer on low for a MINIMUM of 1 hour, best is 2-3 hours. If the liquid gets too low, add a little more.
6. ½ hour or so before using the sauce, add in the tomato sauce and stir. (If you want you can add a little basil and oregano – I did this to ½ the sauce.)

Read more: http://www.bellalimento.com/2009/11/10/bolognese-sauce/#ixzz0eK7fPZ87

Reviews:
Both the original sauce found on bellalimento's sight and this version are amazing, just depends on how much tomato you feel like. I am in love with this sauce and I can see I will be making it again in the near future (after the leftovers in the freezer run out).

This recipe make a lot of sauce, and so I have some in the freezer just waiting for me. I am looking forward to see the results of freezing on the sauce. I used this sauce to make lasagna (coming very soon!).

Sunday, January 31, 2010

Egg Rolls


I had stumbled across this recipe a while ago on My Kitchen Café, and thought it would be fun to try and make them. The problem I soon discovered was in trying to find egg roll rappers. Apparently they aren’t easy to find around here.

I finally stumbled upon the wrappers and all the necessary sauces and was able to whip up some up. The key was to look in the correct area of the store – and despite the warnings from the author, they were actually called egg roll wrappers, not spring roll wrappers.

I decided to ½ the recipe as it was going to produce way more than I needed.

Egg Rolls
1 package vermicelli noodles
1lb ground pork
1 lb ground chicken
½ head of cabbage, shredded finely
2 whole eggs
1 egg white (save the egg yolk for sealing the egg rolls)
1/4 pound carrots, shredded finely (about 2-4 depending on size)
1 onion, finely chopped

Cook the noodles according the package instructions (soaking in hot water for 10 to 20 minutes). Once soaked, drain very well and chop noodles up a bit into 2-3 inch pieces (not too short).

Mix all the above ingredients (noodles, meat, cabbage, whole eggs, egg whites, carrots and onions) in a large bowl. Hand mixing works best. Then add:

1 1/2 tablespoons salt
4 tablespoons oyster sauce
2 tablespoons soy sauce
1/2 tablespoon black pepper
1 tablespoons fish sauce

Mix together.

Take a wrapper and place filling about a 1/3 of the way up the wrapper. Fold the end over, then fold the bottom up and roll. Seal using the leftover egg yolks.

In a pot heat oil (I used safflower) to about 375F. Drop in the rolls and cook until golden brown and cooked through, you will have to turn them so it cooks on both sides. (I tested the first couple with a thermometer to figure out how long it took to cook the insides.)

Reviews:
I only wrapped about 1/3 of the filling before I ran out of wrappers, oops. I froze the rest of the filling to use later – note this makes a lot of filling.

These were delicious, O loved them and friends enjoyed them. The 30 that I made and wrapped were gone in a matter of days, even after putting them in the freezer! They are completely addictive, and I can’t wait to make up the rest of them (although I am trying to hold out as I can’t imagine they will last very long).

A tip: make a bunch and put them in the freezer after cooked. When you want to have them for supper bake them for 20 min at 350F. They remain crisp and still taste amazing!

Monday, January 18, 2010

Quick "Asian" Noodles


I wanted something to go with the beef and broccoli I was making, and while in the grocery store I checked out the selection of asian noodles – they had the fresh Shanghi noodles ( a soft, thick yellow coloured noodle) on sale and decided to try it. My mother used to cook with them once in a while and I remembered they were pretty good, and there was a recipe on the back of the package. I combined it with a recipe from Steamy Kitchen (15 min Asian noodles).

Quick Noodles

1 lb “fresh” Asian noodles (refrigerated section, with other asian foods)
2 stalks green onion, cut in small slices/rings
1 carrot, thinly sliced or shredded
4 tablespoons oyster sauce
4 teaspoon soy sauce
2 tablespoon sherry
2 tablespoon cooking oil (canola or vegetable)

Directions:
1.In a hot frypan or walk heat the oil and add the carrots and green onions, and fry until tender.
2.While veggies fry mix the oyster sauce, soy sauce and sherry together.
3.When veggies are almost done add in the noodles (cooked if the package says to cook them first, but these just needed to be heated) and mix with the veggies. Cover the sauce and cook until heated.
4.Enjoy!


Reviews:
These were pretty yummy, and they were ready I about 10 min or so. They paired great with the beef and broccoli.

The noodles I used:

Beef and Broccoli


Beef and Broccoli

I love beef and broccoli, it was also my favourite dish from the little chinese place growing up. The owner/chef/water made amazing beef and broccoli. Sadly, I have moved away from my little hometown, and I think that he has since closed his restaurant. I came across this recipe after hearing great things about the site Steamy Kitchen and decided to try it.

Beef and Broccoli


Ingredients:

3/4 pound flank or sirloin, sliced thinly across the grain
1 pound broccoli florets
1 tablespoons high-heat cooking oil
1/4 to 1/2 tsp minced garlic
1 teaspoon cornstarch, dissolved in 1 tablespoon water

Marinade

1 teaspoon soy sauce
1 teaspoon sherry
1/2 teaspoon cornstarch
Dash teaspoon freshly ground black pepper

Sauce

2 tablespoons oyster sauce
1 teaspoon sherry
1 tablespoon soy sauce
1/4 cup chicken broth

Method

1. Stir together the beef marinade ingredients in a medium bowl. Add the beef slices and coat, let stand for 10 minutes

2 While beef marinates stir together the sauce ingredients in a small bowl.

3 Cook the broccoli using your favorite method (I steam mine, keeps more of the nutrients in them). Keep them tender crisp, as they will cook a little bit more, but not much in the frying pan.

4 Heat a large frying pan or wok over high heat until a bead of water sizzles and instantly evaporates upon contact. Add the cooking oil and swirl to coat. Add the beef and immediately spread the beef out all over the surface of the wok or pan in a single layer (preferably not touching), fry undisturbed for 1 minute. Flip the beef slices over, add the garlic to the pan and fry for an additional 30 seconds to 1 minute until no longer pink, Pour in the sauce, add the blanched broccoli and bring to a boil. Pour in the dissolved cornstarch and cook, stirring, until the sauce boils and thickens, 30 seconds.


Reviews:
I love this recipe! It isn’t as good as the one from the little hole in wall restaurant I grew up with, but it is still delicious. And the best part – it is so quick and easy to make!

Friday, January 8, 2010


Quick Dinner – Stirfry

There are some nights during the week that I need a supper I can through together quickly and without much thought (or nights that I just don’t have the energy to make something big). There are also days when I want something a little lighter for supper – without all the butter, cheese and bacon that O loves so much.

We eat “stir fry” of some sort at least once every other week, and usually once a week. Sometimes we put it on noodles, other times we serve it over rice and occasionally rice noodles. We switch up the sauces, and sometimes add a special vegetable, or different meat to keep it interesting. At the bottom I will share some of the most common additions or changes that get made in the house, but first I will give you the basic recipe. Play with it as you like.

Chicken “Stir Fry”
Ingredients:
1 green bell pepper
½ bell pepper (red, yellow or orange)
½ onion
2 to 3 stalks celery
2 to 3 chicken breasts
1 tbsp oil
2 tbsp soy sauce
1 tsp ginger
2 tsp honey
½ tsp corn starch
2 packs of “ramen” noodles (I use the cheap store brand, all you need is the noodles)

Directions:
1.Take the vegetables (except celery) and chicken and cut them into long thing strips. Chop the celery into fairly large chunks.

2.In a wok or large frying pan, heat oil and cook the strips of chicken until just done.
3.Add in the vegetables and cover. Cook until the vegetables are just tender, stirring often (I cover, so the vegetables steam a little and then I don’t have to chop them as small, but they don’t take forever to cook)
4.As the vegetables are cooking mix the soy sauce, ginger, corn starch and honey together in a bowl. (If using solid honey, just microwave for 10 seconds to soften and everything will combine) Cook the noodles according to the direction,drain and DO NOT add the seasoning packet.
5.When the vegetables are tender-crisp (or done to your liking), add in the sauce you mixed and stir to coat.
6.Optional: Add the noodles, stir to coat and fry a little.

Enjoy!

Variations:
1.Serve over rice instead of noodles
2.Serve over vermicelli rice noodles
3.Add bean sprouts with the vegetables
4.Add a little garlic to the sauce or with the vegetables
5.Use a bottled sauce of a desired flavour – we are fond of Szechuan
6.Add some broccoli to the vegetables
7.Add some carrot to the vegetables

Reviews:
As I have said previously, this is a staple in our house. We enjoy it – it is quick, light and is packed full of veggies!

Friends who have tried variations of this have also enjoyed it.


Have ideas for other variations? Let me know, we are always looking for new ways to change this dish up a little!

Thursday, January 7, 2010

Quick Dinner - Grilled Tuna Melt


There are some days that I need a quick dinner – or a dinner that is easy to transport. Sandwiches are great for a supper on the go and for something quick, but after eating plain old sandwiches for lunch a few days a week – you don’t really want them for supper. The other problem with a sandwich is that I like my suppers to be at least warm in the winter. So when I am feeling a bit lazy or need something quick we will often have a grilled cheese, but even that gets old after a while.

I decided to spice it up a little while ago and do a tuna melt instead of a plain grilled cheese. Now in the summer I will often make these as an openface sandwich, but I needed these to be portable, so I decided on a grilled version – kind of like a grilled cheese.

Grilled Tuna Melt.

Ingredients:
2 cans of tuna, drained
3 to 4 tbsp Miracle Whip (or mayonase)
2 stalks celery, chopped
1/3 to ½ cucumber chopped
salt and pepper
grated cheddar cheese
slices of bread

Directions:
1.In a bowl combine the tuna, miracle whip, celery, cucumber, salt and pepper until mixed You want enough mayonnaise/miracle whip to hold everything together.
2.Butter two slices of bread. On the unbuttered side place tuna mixture (between ¼ cup and ½ cup, to your liking), sprinkle with cheese and top with the second slice of bread (buttered side out).
3.In a hot frypan, grill the sandwich – just like a grilled cheese, until the bread is toasted and cheese has melted.
4.Repeat steps 2 and 3 for each sandwich.

I usually get about 4 to 6 sandwiches depending on the size of the bread and how full I decide to fill them that day.

Reviews:
I love these sandwiches on a cool night. They are warm, creamy, cheesy, crunchy and just comforting! They made a great portable supper when I needed to run some food to O who was working late one night, and was great for him to eat as he could just pick it up.

Monday, December 28, 2009

Shepard's Pie


I am never a fan of mashed potatoes the next day, they seem to lose something with the storage, so instead of trying to eat my way through another plate of turkey dinner, after the holidays, I like to make something warm and comforting. I love shepard's pie in the winter, there is just something comforting about curling up with a plate when it is cold outside.

This is also great as it gets rid of extra gravy, mashed potatoes and vegetables from turkey dinner (which saves a lot of prep time).

My Shepard's pie

1 lb lean ground beef
2 stalks celery, chopped
1/2 onion chopped
1 cup frozen corn (if desired)
1-2 cup leftover carrots (or frozen mixed veggies)
Leftover gravy (or make some with a clubhouse mix)

Directions:
1. Brown the meat and then add the celery and onion until the meat is cooked. Add the vegetables and gravy, mix and pour into a 3 quart casserole dish.
2. Top with the mashed potatoes (you will want at least an inch or so on top of the meat mixture). Using a fork draw lines in the potatoes (this will allow them to crisp up while baking).
3. Bake at 350F for about 30 minutes.

Enjoy!

Reviews:
This turned out really well, and even using the clubhouse gravy (made with water) it wasn't too salty. It was also a great change after all the turkey!

Quick Turkey Pot Pie


Owen loves these, and insists on having them when we have turkey leftovers. I usually make a couple and store some in the freezer for later (when I am not so tired of turkey). This is the quick and simple way to make them, and it doesn't take long the through them together, but everyone seems to really like them! Owen took one to his work potluck and everyone enjoyed it.

Note that this recipe works well all year if you use chicken meat instead of turkey. You can cook a couple chicken breasts (and dice) are use leftovers from a roast chicken.

Turkey Pot Pie (makes 1 pie)
Ingredients:
Pie shell (for a double crust pie)
1 can cream soup (I usually use mushroom, but broccoli and chicken also work well)
Diced cooked turkey
Frozen veggie mix (or leftover veggies from turkey dinner)
Diced, cooked potatoes (optional)
shredded cheese (optional)

Directions:
1. In a bowl mix the cream soup, turkey, veggie mix, potatoes and cheese.
2. Roll out pie shell and line the pie plate. Pour in the filling and top with the top crust.
3. Pinch the edges together, and cut vents in the top of the pie ( I do 4 slits).
4. Bake at 350F for 25-30 minutes until the crust is cooked. (if you would like a golden pie top, brush with some oil or egg whites before baking).

Reviews:
Owen loves these and they get made with both turkey and chicken leftovers! It only takes a few minutes to pull together, which is great.

Saturday, December 5, 2009

Ravioli Soup


I saw a recipe for this in Once a Month Cooking and decided to try it. The recipe seemed alright, but didn’t have enough veggies in it for my liking, so I added a few things as I went along and omitted others.

I made a large batch of soup, and before it was done froze half for another night. It didn’t involve any extra work as I was making it already which was great. You could also just make it and freeze all of it as it is quick to pull together.

Ravioli Soup (Makes 1 supper, + leftovers, and 1 meal for the freezer)

Ingredients
1 lb lean hamburger
1 medium onion
½ green pepper
½ red pepper
1 lg. carrot
1 cup shredded zucchini ( I used frozen)
2 tsp minced garlic
1 28oz can crushed tomatoes
1 28 oz can diced tomatoes
1 cup chicken stock
1 tsp onion powder
1 tsp garlic salt
½ cup chopped fresh parsley
1 tbsp basil
1 tbsp oregano
pinch of sugar
1 family pack ravioli
Parmesan cheese

Directions
1.In a pan, brown the hamburger (I do this in my dutch oven so I don’t have to switch pots). When the meat is brown, add the onions, peppers, carrots and garlic, and sauté until the veggies are starting to soften and onions are translucent.
2.Add the zucchini, tomatoes, chicken stock, spices, and sugar to the pot. Allow to simmer together for 10 minutes. (At this point I always taste it and see if I want to add more seasoning, as it sometimes depends on the tomatoes used). At this point I remove ½ the pot into a freezer container and it goes into the freezer. When you want to have it for supper, thaw the soup and pick up the directions at step 3.
3.Allow to cook and simmer for 30 minutes. During the last 10 minutes of cooking, cook the ravioli according to the package directions. Once they are cooked add them to the soup. (if the soup is too thick you can add water or chicken stock to thin it.)
4.Ladle soup into bowls and top with Parmesan cheese.

Reviews:
This is a great soup, with lots of veggies. If you use the low sodium tomatoes, it is a great meal. To make it a vegetarian meal simple don’t add the ground beef to the soup and use a cheese ravioli.

Owen and I both loved this soup and I can’t wait to take the rest out of the freezer next week.

Sunday, November 29, 2009

Roast Rice Milanese


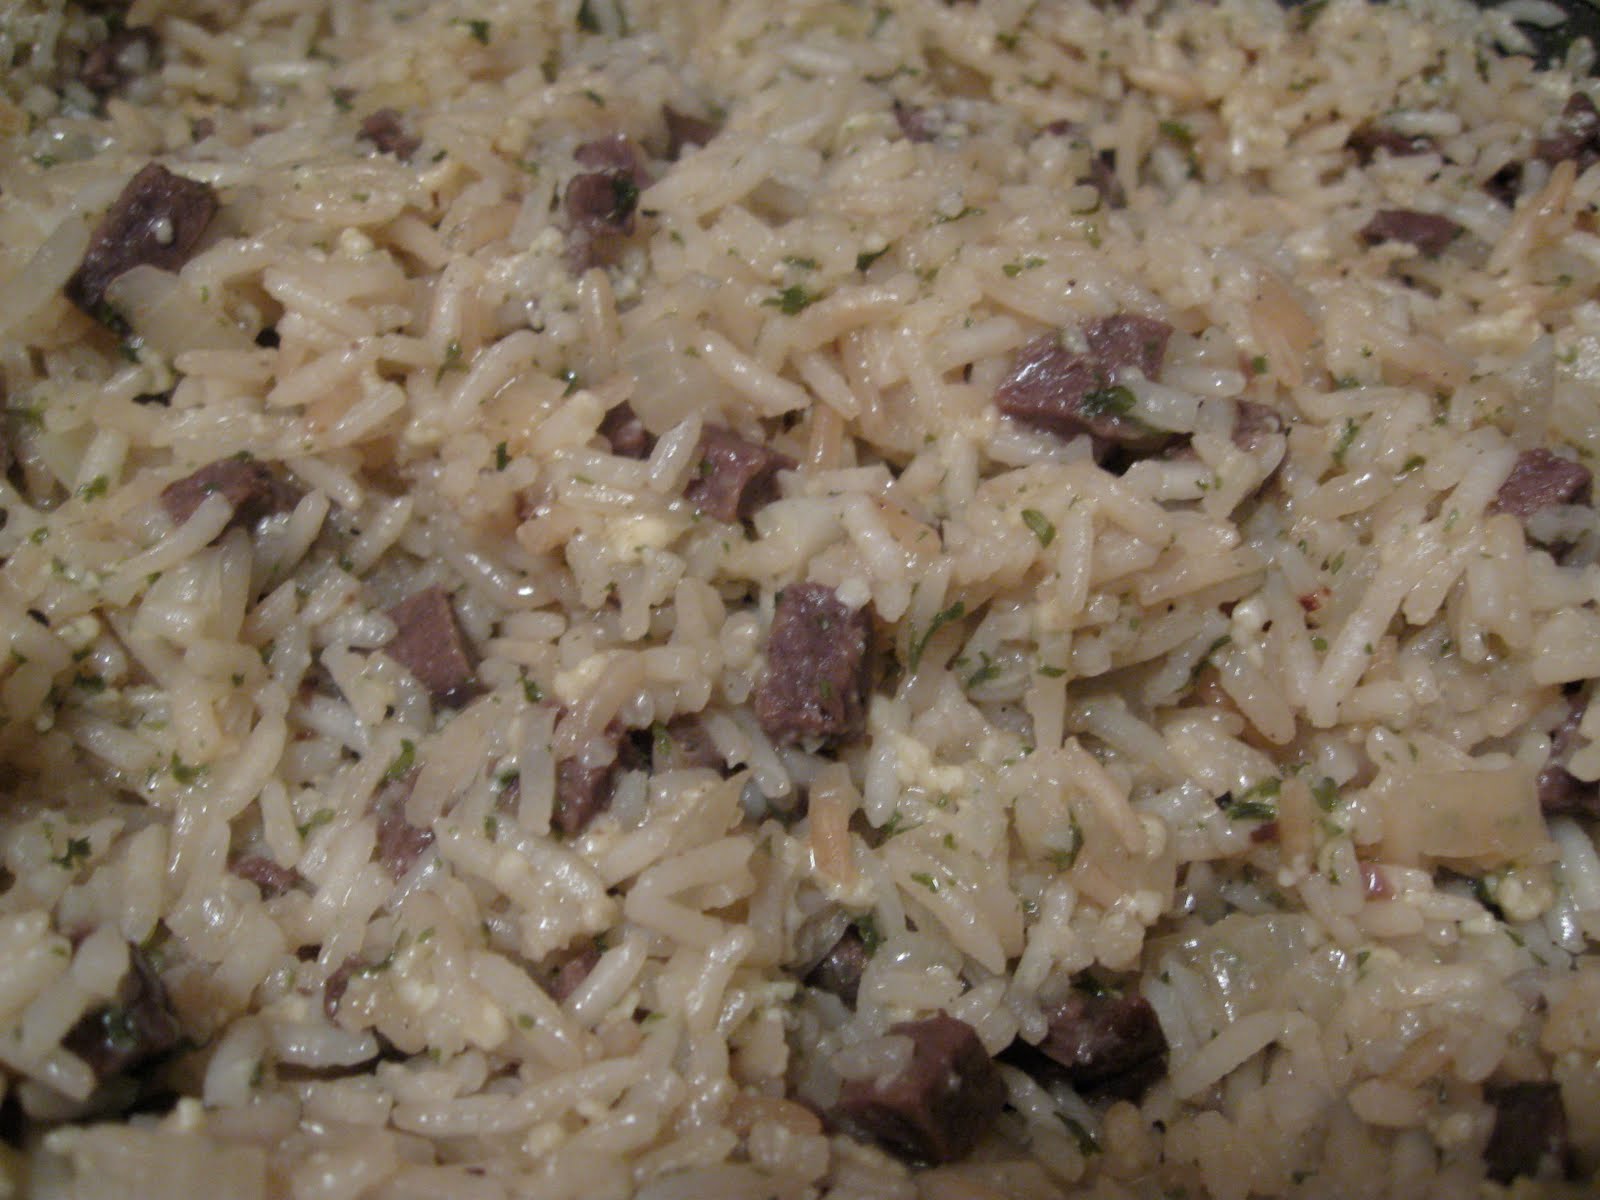
I got this recipe out of the Companies Coming Rookie Cookbook. It is delicious, and I have played a little with it to make it a little more versatile. This recipe is great and it is what I always plan for the day after having roast for supper.

I have made this and had it turn out great with both beef and venison. Also instead of using roast leftovers, I have finely chopped stew chunks and fried the small chunks.

Ingredients
1 cup uncooked long grain white rice
1 small onion (finely chopped)
¼ cup margarine (Don’t use butter, it will brown too fast)
1 cup meat, coarsely chopped (beef, venison, moose roast or fried stew meat)
2 ½ cups water
1 tbsp beef bullion
¼ tsp pepper (Owen likes a little more, go with what you like)
1 tbsp Parsley flakes
1/3 cup grated Parmesan cheese

Directions
*. If using stew chunks or other uncooked meat, fry them until cooked in a fry pan on medium high heat. You can either remove them when cooked or leave them to cook a little with the rice and onion.
1. Combine the rice, onion and margarine in a fry pan over medium high heat and sauté until the rice and onion have a golden colour.
2. Add the meat, water, beef bullion, pepper and parsley. Bring to boil and reduce heat to medium low. Cover and let simmer until the rice is tender (about 15 minutes).
3. Stir in the parmesan cheese and serve.

Reviews:
I like this as a quick meal and it is one of Owen’s favorite. When I first started making this dish, he asked for it at least once a week and I had to double the recipe when I made it.

I like to put some roast leftovers chopped and measured into the freezer, then I can thaw it as I brown the rice and supper is done in 20 minutes!

Thursday, November 26, 2009

Pasta at Home


Homemade Pasta
I love puttering in the kitchen once in a while. One day it was cool outside and I wanted a yummy meal and felt like spending a little time working on it. I was going through blogs and stopped when I came to Pastor Ryan’s Bolognese sauce on Pioneer Women. This looked deliscious, and part of that was the homemade pasta. I knew this is what I wanted.
Now making pasta really isn’t very hard, especially with only 2 ingredients. However, it can take a little time and patience to roll it out thin if you don’t have a pasta roller/cutter (which I do not).
Ingredients (per person)
1 egg
½ cup flour

How too:
1. Make a well in the center of the flour and drop the eggs into the well.
2. Mix by hand until the dough comes together, then knead on a floured surface until you get a smooth elastic dough.
3. Shape the dough into a ball and let rest for about 30 min. (or store well wrapped in the fridge for a day or two).
4. Roll the dough as thin as possible. I often will hang it over the back of a chair, or the side of the counter and let it stretch itself thing as well.
Cut into thin strips, keeping the strips separated so they do not stick and form a clump.
5. To cook, drop the noodles into boiling heavily salted water. They will only take 1 -2 min to cook (generally when they are all floating, they are done).
I sprinkle mine with a little bit of italiano seasoning after taking them out of the pot.

Reviews:
I love homemade pasta, O thought they were great and so did our friend. I was snacking on them even without the sauce (recipe to come later).

Sunday, November 22, 2009

Slow cooker Venison Roast


Friends of ours were coming over for dinner and while looking through my freezer for the pheasants (my original meal plan) I accidently tore the wrapping on a roast. I didn’t want it to freezer burn or anything so the plan changed – I was cooking roast. I was not upset by the change as the roast is a lot less work and I already had a great plan for the leftovers.
I let the roast thaw overnight and the next day I threw it into the slowcooker with a few ingredients. All that was left before supper was to make mashed potatoes and cook the beans, which gave both my husband I more time to visit with our friends.
Slow Cooker Venison (slightly adapted from Allrecipes)
Ingredients:
1 2-4 lb roast
1 onion sliced
1 tbsp soy sauce
½ tbsp worcestershire sauce
½ tbsp garlic salt
½ tsp ground black pepper
1 pkg onion soup mix (like lipton)
1 can cream of mushroom soup
2 tbsp flour
¼ cup water

Directions:
Place the roast in the slow cooker and cover it with onions, soy sauce, Worcestershire sauce garlic salt and pepper.
In a bowl mix together the onion soup mix and the mushroom soup. Pour it over the roast.
Let the roast cook on low for 6-7 hours, until the internal temp is 140F to 170F. A lot of this will depend on the size of your roast and how well you like it done
Remove the roast and slice on a cutting board. While it is resting(before cutting) strain the onions (if you wish) from the liquid. Mix the water and flour to form a slurry, and pour into the liquid to make a gravy. This will be a thin gravy but thickens a little as it cools. However, it is delicious.

Reviews:
This was a great supper, it really didn’t take much effort at all and the meal was enjoyed by everyone – even our friend who doesn’t eat much (if any) red meat (Don’t worry I cooked a tuna steak for her – recipe to come later).

Friday, November 20, 2009

Stuffed Manacotti

When I have some odds and ends in the fridge I feel like using I generally tend to make manacotti. I don’t follow the traditional recipe, or any recipe for that matter and it turns out a little different each time. I love experimenting with the different flavors and the tasty combinations that come out of it. I am going to share with you some of the most common mixes that I use, to which I will usually add whatever odds and ends of veggies and cheeses I have in the fridge.

The reason I am sharing this? I am slowing becoming obsessed with freezer meals. These make a fantastic freezer meal, just stuff the shells and freeze. Then when you want to eat them you can pull as many out as you would like, put them in a dish, top with some sauce and cook. You could freeze them as a ready to go in the oven dish as well, but I find freezing individually gives me more flexibility.

I am sorry for the lack of amounts for these recipes, but I just toss things into a bowl and then stuff as many shells as I can with what I have. Make the mixture look right to you and your family’s preferences.

Chicken Alfredo Manacotti

Ingredients:
Cooked chicken (this can be breasts that have been cubed or shredded, or ground chicken, or even turkey)
Ricotta cheese (you can substitute cottage cheese if you want)
Veggies, finely chopped (I love using greens with this, green pepper, broccoli, spinach)
1 box manacotti noodles
Alfredo sauce*
Cheese for topping (cheddar, mozza, swiss, Parmesan)*

Spinach Manacotti:
Ingredients:
Ricotta (or cottage) cheese
Chopped baby spinach (or frozen chopped spinach)
Manacotti noodles
Pasta sauce (I use a can of tomato sauce, with Italian seasoning added to it)*
Cheese to top (cheddar, mozza, parmasan ect).*

Sausage Stuffed Manacotti
Ingredients:
Cooked chopped sausage (or ground sausage filling cooked, ground beef cooked)
Ricotta cheese (or cottage cheese if you prefer)
Veggies finely chopped (shredded carrot, zucchini, peppers, onion, spinach ect)
Manacotti noodles
Pasta sauce (or tomato sauce with seasonings of your choice)*
Cheese to top*

* if you are freezing individually, you will not need these ingredients until you are ready to cook the dish.

Preparation

1.In a bowl mix together the ricotta cheese, veggies and meat. If it looks a little dry you can add a tbsp or two of the sauce.
2.In a large pot cook the manacotti to eldante, if you overcook them they will split and be a little harder to work with. We will be baking this, so they will soften up more.
3.Using a small spoon (teaspoon) spoon the filling into each of the cooked noodles. Place the noodles in a casserole dish if you wish to cook them for supper (or freeze as a put together dish), or on a cookie sheet to freeze.

To cook:

1.Take the stuffed pasta out of the freezer and let thaw a little, in a casserole dish.
2.Pour the sauce over the stuffed pasta, and sprinkle cheese on the top.
3.Bake at 350F for 20-30 minutes (if they went in frozen you may have to cook them a little longer. If they look like they are getting a little dry, cover them). The cheese on top should be bubbly and the manacotti should be hot through.

Thursday, November 19, 2009

Shanghi Casserole


This recipe came from my mother in law (I have changed it a little, as I am not feeding 3 growing boys), and was requested by Owen. I have come to love the flavored rice and the crunch of the “noodles” on top. It is made at least once a month in our house (that is about as often as anything is made around here with the exception of spaghetti).

About the name, I am really not sure why it is called Shanghi Casserole, but that is what O always calls it, and that is what it says on the top of the recipe his mom sent me.

Shanghi Casserole
Ingredients:
½ lb ground beef
2 stalks celery
½ med onion
1 can cream of mushroom soup
¼ cup milk
2 tbsp soy sauce
1 ½ cup uncooked rice
2-3 cups Chow mein noodles (the dry crunchy ones)

Directions:
1.Put the rice on to cook (I have a rice cooker for this, but go with however you normally cook rice). While the rice is cooking brown the meat and sauté with the onion and celery until the vegetables are soft.
2.Combine the milk, soup and soy sauce in a separate bowl
3.When everything is ready drain the fat off the meat and combine the meat, rice and soup mixture in a 3 quart casserole dish.
4.Bake at 350F for 20 mintues. Remove the casserole and top with the noodles, pressing them into the rice mixture a little. Bake for another 10 minutes.
5.Enjoy.

Freezer Meal:
I will most often cook up twice the amount of meat and veggies I need for this and freeze ½ of it. Then all I have to do when I come home is throw some rice in the rice cooker and mix everything together and bake (providing I remembered to take the meat mixture out of the freezer that morning to thaw). I am sure it would also work if you froze everything mixed, just undercooked the rice a little ( I will halve to try this soon).
Reviews:
This is a standby in our house and it starting to become comfort food to me. I don’t know what is about mushroom soup flavoured rice, but I love it. O has eaten this since he was young and still loves it.

Thursday, November 5, 2009

Slow Cooker Chili


My husband loves beans, and he is a fan of a good chili on a cold day. I love doing it in the slow cooker, It doesn’t require a lot of work on my part, and the flavors have lots of time to mix together and become something delicious. This is approximations, as when I cook chili there is a lot of tossing in random vegetables out of the fridge, tasting and adding spices depending on my mood that day.

Ingredients:
1 onion
2 stalks celery
1 lb ground meat (I used ½ lb beef and ½ lb venison as they were the first things I grabbed)
1 can crushed tomatoes
1 can tomato sauce
2-3 cans beans (I used all kidney this time, but sometimes I add navy beans as well)
peppers (doesn’t really matter what kind, use what you like best)
2-3 small hot peppers
grated carrots
1 can corn nibblets
2 tbsp chili pepper
2tbsp cup cumin
1 tbsp Italiano seasoning
garlic, salt and pepper to taste

Directions:
1. Brown meat with the celery and onions. Rinse off the beans.
2. Combine everything in the crockpot and cook on low for 8-10 hours. I always taste it when I get home and add any extra spices I think may help (more cumin, more chill powder, more tomato sauce ect) and then let it finish cooking – this works well as I get home around the 8.5 hour mark.

This is also fantastic as a vegetarian meal – just don’t add the meat. It has gone of really well with both meat eaters and vegetarians alike. Owens favorite serving method is in a bread bowl (well he likes most things in a bread bowl). The bread bowls here are from the Italian bread bowls My Kitchen Café.

Sunday, October 18, 2009

Turkey Tips


So this thanksgiving I cooked my first turkey - completely by myself. I have never cooked a turkey before, I much prefer to leave it in the hands of the more experienced. Despite that however, my Mother left me on thanksgiving with a raw turkey and instructions to have dinner ready by 7. I came across the Food Networks top 10 Turkey tips and decided to give them a try along with a few tricks I wanted to try. It was an adventure all right.

How I made my turkey:
1. Make sure the turkey is cleaned out (remove the neck and don't forget the packet of gizzards - I unfortunately couldn't find this in my turkey turns out it was just in the other end).
2. I gently separated the skin from the breast with my hand and rubbed some corse salt, italian seasoning, and pepper under the skin.
3. Then I put the skin back down and rubbed the top of the skin with butter - I buttered the entire turkey. (oh it was delicious skin).
4. Cut an apple and an onion in half and stuffed them into the chicken.
5. Now seal up the turkey, I used a "lacer" which was basically a spiral of wire to close one end and then as there was a gap were a wing had gone missing I used a few needles.
6. Then as I am terrified of dry breasts, I covered them with tinfoil.
7. I put the turkey in the oven at 350 and left it for just under 3 hours, removed the tinfoil and left for another 45 minutes (It was a 14lb turkey and took just over 3.5 hours to cook).

Oh was this good. The meat was cooked and still utterly moist and juicy. Oh how I loved my turkey, and I was very excited that I didn't end up with an almost burnt or raw bird. I am no longer scared of the turkey (which is good, as I have a 16 lb one sitting in my freezer - thanks mom), and I hope that I will be able to repeat the juicy meat on my next try! The next challenge is to figure out how to carve the turkey, hmmm.